Sign In
Upload
Manuals
Brands
HP Manuals
Laptop
OmniBook 6100
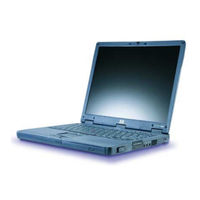
HP OmniBook 6100 Notebook PC Manuals
Manuals and User Guides for HP OmniBook 6100 Notebook PC. We have
5
HP OmniBook 6100 Notebook PC manuals available for free PDF download: Manual, Reference Manual, Service Manual, Startup Manual, Information
HP OmniBook 6100 Manual (225 pages)
HP Omnibook 6100 - Corporate Evaluators Guide
Brand:
HP
| Category:
Laptop
| Size: 1.24 MB
Table of Contents
Important Safety Information
3
Table of Contents
7
Getting Started with Your HP Notebook
13
Taking Inventory
14
What's in the Box
14
To Buy Accessories
15
To Find more Information
16
Identifying Parts of the Computer
17
Front View
17
Back View
18
Bottom View
19
Status Lights
20
Setting up Your Computer
22
Step 1: Install the Battery
22
Step 2: Connect AC Power
24
Step 3: Connect a Phone Line
25
Step 4: Turn on the Computer
26
Step 5: Set up Windows
26
Step 6: Register Your Notebook
27
What to Do Next
28
To Connect to the Internet
28
Basic Operation
29
Operating Your Computer
30
To Turn the Computer on and off
30
To Reset the Computer
31
To Change the Boot Device
32
To Use the Pointing Devices
32
To Use the Fn Hot Keys
34
To Use the One-Touch Buttons
35
To Use the Windows and Applications Keys
36
To Use the Embedded Keypad
36
To Use the ALT GR Key
37
To Adjust the Display
37
To Adjust the Volume
38
To Change Computer Settings for a Presentation
39
To Work with Cds and Dvds
39
Securing Your Computer
40
To Set up Password Protection
40
To Attach a Security Cable
41
To Protect against Viruses
42
To Set PC Identification
42
To Lock the Hard Disk Drive
43
Working in Comfort with a Notebook PC
44
Taking Care of Your Computer
46
To Protect Your Hard Disk Drive
46
To Maintain Your Computer
46
To Safeguard Your Data
47
To Extend the Life of the Display
47
To Clean Your Computer
48
Batteries and Power Management
49
Managing Power Consumption
50
How the Computer Manages Power Automatically
50
To Manage Power Manually
52
Using Battery Power
53
To Check Battery Status
53
To Respond to a Low-Battery Warning
54
To Recharge the Battery
54
To Use Additional Batteries
54
To Get the most from Your Batteries
55
To Maximize Processor Speed
56
Modem and Network Connections
57
Using the Modem
58
To Connect the Modem
58
To Connect to the Internet
60
To Disconnect from the Internet
61
To Dial in to a Network
61
To Change Your Modem Settings
61
To Send and Receive E-Mail
62
To Send and Receive Faxes (Windows 98)
63
To Send and Receive Faxes (Windows 2000)
64
To Send and Receive Faxes (Windows XP)
65
Connecting to a LAN
66
To Connect to a LAN
66
Making Wireless Connections
67
To Prepare for Connections (Windows 98 or 2000)
67
To Prepare for Connections (Windows XP)
69
To Turn Wireless Communication on and off
70
Add-On Devices
73
Using Plug-In Modules
74
To Install Hot-Swap Support (Windows 98)
74
To Replace a Plug-In Module
74
To Connect the Floppy Disk Drive to the Parallel Port
76
To Insert or Remove a CD or DVD
77
To Play DVD Movies
78
To Create or Copy Cds
78
Connecting PC Cards
79
To Insert or Remove a PC Card
79
Connecting External Devices
81
To Identify Connectors for External Devices
81
To Connect a Printer or Other Parallel Device
82
To Connect an External Keyboard or Mouse
82
To Connect a USB Device
82
To Connect an Audio Device
83
To Use an External Monitor
83
To Use a TV Set as a Monitor
85
To Connect a Serial Device
86
To Connect an Infrared Device
86
To Use a Docking Product
87
Installing Additional RAM
90
To Install a RAM Expansion Module
90
To Remove a RAM Expansion Module
92
Replacing the Hard Disk Drive
93
To Replace the Hard Disk Drive
93
To Replace the Hard Disk Drive Holder
94
To Prepare a New Hard Disk Drive
95
Using Windows XP
97
Installing Retail Windows XP
98
Requirements
98
To Prepare for Software Installation
99
To Install Windows XP (Non-HP OEM)
100
To Install Video Support (ATI Radeon)
102
To Install Audio Support (ESS Allegro)
102
To Install Modem Support (USR)
103
To Install Touchpad Support (Synaptics)
103
To Install Wireless LAN Support (Actiontech)
104
To Install Hewlett-Packard Configuration Interface (HPCI)
104
Using Windows 2000
107
Installing Retail Windows 2000
108
Requirements
108
To Prepare for Software Installation
109
To Install Retail Windows 2000 Professional
110
To Install the Chipset Driver (Intel 830 Series)
111
To Install Video Support (ATI Mobility Radeon)
112
To Install Audio Support (ESS Allegro Series)
112
To Install Touchpad/Trackpoint Mouse Support (Synaptics)
113
To Install LAN Support (Intel)
113
To Install PCI Modem Support (3COM)
114
To Install Infrared Support
114
To Install Intel® Speedstep™ Technology Applet
115
To Install HP Configuration Interface Support (HPCI)
116
To Install USB FDD Support
117
To Install Wireless LAN Driver (Actiontech)
118
To Configure Power Management
118
Using Windows 98
121
Installing Retail Windows 98 Second Edition or Windows 98
122
Requirements
122
To Prepare for Software Installation
123
To Install Retail Windows 98 Second Edition
125
To Install Chipset Support (Intel 830M)
126
To Install Microsoft Hot Fix Support
127
To Install Directx 7.0A Support (Microsoft)
127
To Install Video Support (ATI M-6 Series)
128
To Install Touchpad/Trackpoint Mouse Support (Synaptics)
128
To Install Audio Support (ESS Allegro Series)
128
To Install Networking Support (Intel)
129
To Install Wireless LAN Support (Actiontech)
130
To Install Modem Support (3COM)
130
To Install Infrared Support
131
To Install Bay Manager Support
131
To Install Intel® Speedstep™ Technology Applet
132
To Install IDE Docking Support (CMD)
132
To Install SCSI Docking Support (Symbios)
133
Using Windows NT 4.0
135
Installing Retail Windows NT 4.0
136
Requirements
136
To Prepare for Software Installation
137
To Install Retail Windows NT 4.0
138
To Install Service Pack 6A for Retail Windows NT 4.0
140
To Create a Partition for Remainder of Hard Disk Space Using Disk Administrator
140
To Install APM (Advanced Power Management) Support
141
To Disable Automatic CD-ROM Detection
141
To Install PCMCIA Support (PC Card)
142
To Install Audio Support (ESS Series)
142
To Install Intel® Speedstep™ Technology Applet
143
To Install Touchpad/Trackpoint Mouse Support (Synaptics)
144
To Install USR Modem Driver
144
To Install Video Support (ATI Mobility Radeon)
145
To Install Networking Support
145
To Install Intel Wireless Networking Support
146
To Create the Emergency Repair Disk (ERD)
147
To Install Docking System Support
148
Troubleshooting and Maintenance
151
Troubleshooting Your Computer
152
Audio Problems
152
CD-ROM and DVD Problems
153
Display Problems
155
Docking Problems
156
Hard Disk Drive Problems
157
Heat Problems
158
Infrared Problems
158
Keyboard and Pointing Device Problems
159
LAN Problems
161
Memory Problems
162
Modem Problems
162
PC Card (PCMCIA) Problems
165
Performance Problems
166
Power and Battery Problems
167
Printing Problems
170
Serial, Parallel, and USB Problems
170
Startup Problems
172
Wireless Problems
173
Testing the Hardware
175
To Run the E-Diagtools Diagnostic Test
175
Configuring the Computer
177
To Run the BIOS Setup Utility
177
To Set up Toptools
183
Reinstalling and Updating Software
184
To Recover the Factory Installation of Your Hard Disk
184
To Create a Boot Disk (Windows 98 or 2000)
185
To Replace a Damaged Recovery CD
185
To Update the BIOS
186
To Update Windows Drivers
186
HP Support and Service
187
Getting Assistance for Your Computer
188
To Get Help from the Web
188
To Contact HP for Support or Service
188
To Receive Repair Service
191
To Prepare Your Computer for Shipment
191
Hewlett-Packard Limited Warranty Statement
192
Reference Information
195
Hardware Specifications
196
Modem Reference Information
199
Modem Reference (Ambit)
199
Modem Reference (3Com/Us Robotics)
206
Safety Information
211
Power Cords
211
Ergonomics
212
Battery Safety
212
Laser Safety
213
LED Safety
213
Exposure to Radio Frequency Radiation
214
Regulatory Information
215
U.s.a
215
Canada
216
European Union
217
Japan
219
Russia
219
International
219
Index
221
Advertisement
HP OmniBook 6100 Reference Manual (173 pages)
HP OmniBook 6100: Reference Guide
Brand:
HP
| Category:
Laptop
| Size: 1.12 MB
Table of Contents
Important Safety Information
3
Table of Contents
7
Getting Started with Your HP Notebook
11
Taking Inventory
12
What's in the Box
12
To Buy Accessories
13
To Find more Information
14
Identifying Parts of the Computer
15
Front View
15
Back View
16
Bottom View
17
Status Lights
18
Setting up Your Computer
20
Step 1: Install the Battery
20
Step 2: Connect AC Power
22
Step 3: Connect a Phone Line
23
Step 4: Turn on the Computer
24
Step 5: Set up Windows
24
Step 6: Register Your Notebook
25
What to Do Next
26
To Connect to the Internet
26
Basic Operation
27
Operating Your Computer
28
To Turn the Computer on and off
28
To Reset the Computer
29
To Change the Boot Device
30
To Use the Pointing Devices
30
To Use the Fn Hot Keys
32
To Use the One-Touch Buttons
33
To Use the Windows and Applications Keys
34
To Use the Embedded Keypad
34
To Use the ALT GR Key
35
To Adjust the Display
35
To Adjust the Volume
36
To Change Computer Settings for a Presentation
37
To Work with Cds and Dvds
38
Securing Your Computer
39
To Set up Password Protection
39
To Attach a Security Cable
40
To Protect against Viruses
41
To Set PC Identification
41
To Lock the Hard Disk Drive
42
Working in Comfort with a Notebook PC
43
Taking Care of Your Computer
45
To Protect Your Hard Disk Drive
45
To Maintain Your Computer
45
To Safeguard Your Data
46
To Extend the Life of the Display
46
To Clean Your Computer
47
Batteries and Power Management
49
Managing Power Consumption
50
How the Computer Manages Power Automatically
50
To Manage Power Manually
53
Using Battery Power
54
To Check Battery Status
54
To Respond to a Low-Battery Warning
55
To Recharge the Battery
55
To Use Additional Batteries
55
To Get the most from Your Batteries
56
To Maximize Processor Speed
57
Modem and Network Connections
59
Using the Modem
60
To Connect the Modem
60
To Connect to the Internet
62
To Disconnect from the Internet
63
To Dial in to a Network
63
To Change Your Modem Settings
63
To Send and Receive E-Mail
64
To Send and Receive Faxes (Windows 98)
65
To Send and Receive Faxes (Windows 2000)
66
To Send and Receive Faxes (Windows XP)
67
Connecting to a LAN
68
To Connect to a LAN
68
Making Wireless Connections
69
To Prepare for Connections (Windows 98 or 2000)
69
To Prepare for Connections (Windows XP)
71
To Turn Wireless Communication on and off
72
Add-On Devices
75
Using Plug-In Modules
76
To Install Hot-Swap Support (Windows 98)
76
To Replace a Plug-In Module
76
To Connect the Floppy Disk Drive to the Parallel Port
78
To Insert or Remove a CD or DVD
79
To Play DVD Movies
80
To Create or Copy Cds
80
Connecting PC Cards
81
To Insert or Remove a PC Card
81
Connecting External Devices
83
To Identify Connectors for External Devices
83
To Connect a Printer or Other Parallel Device
84
To Connect an External Keyboard or Mouse
84
To Connect a USB Device
85
To Connect an Audio Device
85
To Use an External Monitor
86
To Use a TV Set as a Monitor
88
To Connect a Serial Device
88
To Connect an Infrared Device
89
To Use a Docking Product
90
Installing Additional RAM
93
To Install a RAM Expansion Module
93
To Remove a RAM Expansion Module
95
Replacing the Hard Disk Drive
96
To Replace the Hard Disk Drive
96
To Replace the Hard Disk Drive Holder
97
To Prepare a New Hard Disk Drive
98
Troubleshooting and Maintenance
99
Troubleshooting Your Computer
100
Audio Problems
100
CD-ROM and DVD Problems
101
Display Problems
103
Docking Problems
104
Hard Disk Drive Problems
105
Heat Problems
106
Infrared Problems
106
Keyboard and Pointing Device Problems
107
LAN Problems
109
Memory Problems
110
Modem Problems
110
PC Card (PCMCIA) Problems
113
Performance Problems
114
Power and Battery Problems
115
Printing Problems
118
Serial, Parallel, and USB Problems
118
Startup Problems
120
Wireless Problems
121
Testing the Hardware
123
To Run the E-Diagtools Diagnostic Test
123
Configuring the Computer
125
To Run the BIOS Setup Utility
125
To Set up Toptools
131
Reinstalling and Updating Software
132
To Recover the Factory Installation of Your Hard Disk
132
To Create a Boot Disk (Windows 98 or 2000)
133
To Replace a Damaged Recovery CD
133
To Update the BIOS
134
To Update Windows Drivers
134
HP Support and Service
135
Getting Assistance for Your Computer
136
To Get Help from the Web
136
To Contact HP for Support or Service
136
To Receive Repair Service
139
To Prepare Your Computer for Shipment
139
Hewlett-Packard Limited Warranty Statement
140
Reference Information
143
Hardware Specifications
144
Modem Reference Information
147
Modem Reference (Ambit)
147
Modem Reference (3Com/Us Robotics)
154
Safety Information
159
Power Cords
159
Ergonomics
160
Battery Safety
160
Laser Safety
161
LED Safety
161
Exposure to Radio Frequency Radiation
162
Regulatory Information
163
U.s.a
163
Canada
164
European Union
165
Japan
167
Russia
167
International
167
Index
169
HP OmniBook 6100 Service Manual (114 pages)
HP Omnibook 6000/6100
Brand:
HP
| Category:
Laptop
| Size: 2.88 MB
Table of Contents
Service Manual
1
Table of Contents
3
Product Information
7
Table 1-1. Omnibook 6000/6100 Models
7
Table 1-2. Product Comparisons
8
Features
9
Figure 1-1. Omnibook - Front View
9
Figure 1-2. Omnibook - Back View
10
Figure 1-3. Omnibook - Bottom View
10
Operation
11
Turning the Computer on and off
11
Table 1-3. Activating Power Modes
11
Checking the Status of the Computer
12
Table 1-4. Main Status Lights (Front of Computer)
12
Table 1-5. Keyboard Status Lights
12
Using Fn Hot Keys
13
Table 1-6. Fn Hot Keys
13
Resetting the Computer
14
Figure 1-4. Resetting the Computer
14
Specifications
15
Table 1-7. Omnibook 6000/6100 Specifications
15
Table 1-8. Omnibook 6000/6100 Accessories
18
Figure 1-5. Replaceable Module Diagram
20
Internal Design
20
Table 1-9. Functional Structure
21
Removal and Replacement
23
Table 2-1. Removal Cross-Reference
23
Disassembly Flowchart
24
Table 2-2. Required Equipment
24
Table 2-3. Recommended Screw Torques
24
Figure 2-1. Disassembly Flow
25
Removing the Battery (User-Replaceable)
26
Figure 2-2. Removing the Battery
26
Removing a Plug-In Module (User-Replaceable)
27
Figure 2-3. Removing a Module
27
Figure 2-4. Removing a Module
27
Removing an SDRAM Module (User-Replaceable)
28
Figure 2-5. Removing a SDRAM Module
28
Removing the Hard Disk Drive (User-Replaceable)
29
Figure 2-6. Removing the Hard Disk Drive
29
Figure 2-7. Removing the Hard Disk Case
30
Removing Mini-PCI Card #1 (User-Replaceable)
32
Figure 2-8. Removing the Mini-PCI Card
32
Removing the Power Button Panel (User-Replaceable)
33
Figure 2-9. Removing the Power Button Panel
33
Replacing Small Parts (User-Replaceable)
34
Table 2-4. Replacing Small Parts (User-Replaceable)
34
Removing the Display Assembly (HP Authorized Service Providers Only)
35
Figure 2-10. Removing the Display
36
Removing the Keyboard (HP Authorized Service Providers Only)
37
Figure 2-11. Removing the Keyboard
37
Figure 2-12. Unplugging the Keyboard Cables
38
Removing the Heatsink (with Fan) (HP Authorized Service Providers Only)
39
Figure 2-13. Removing the Heatsink
39
Removing the CPU Module (HP Authorized Service Providers Only)
41
Figure 2-14. Removing the CPU Module
41
Removing the Top Case (HP Authorized Service Providers Only)
43
Figure 2-15. Removing the Top Case: Omnibook 6100 Models
44
Figure 2-16. Removing the Top Case: Omnibook 6000 Models
45
Removing the Motherboard or Bottom Case (HP Authorized Service Providers Only)
46
Figure 2-17. Removing the Motherboard: Omnibook 6100 Models
47
Figure 2-18. Removing the Motherboard: Omnibook 6000 Models
48
Figure 2-19. Installing Docking Doors
49
Figure 2-20. Installing the Lower PCMCIA Door
49
Replacing the Motherboard
50
Table 2-5. Motherboard and PCA Compatibility
50
Figure 2-21. Replacing Motherboard Components: Omnibook 6100 Models
51
Figure 2-22. Replacing Motherboard Components: Omnibook 6000 Models
52
Figure 2-23. Example of Serial Number Label
54
Replacing the Bottom Case
54
Repairing the BIOS IC (HP Authorized Service Providers Only)
55
Removing Other Components (HP Authorized Service Providers Only)
56
Figure 2-24. Boot-Block Jumper
56
Table 2-6. Removing Omnibook Components
56
Troubleshooting and Diagnostics
61
Troubleshooting
62
Figure 3-1. Basic Troubleshooting Steps
62
Checking for Customer Abuse
63
Troubleshooting the Problem
63
Verifying the Repair
64
Suggestions for Troubleshooting
65
Table 3-1. Scope of Diagnostic Tools
65
Table 3-2. Troubleshooting Suggestions
66
Diagnostic Tools
77
Overview of Diagnostic Tools
77
Figure 3-2. Diagnostic Screens - Basic and Advanced
77
Figure 3-3. Serial and Parallel Loopback Connectors
79
Table 3-3. Omnibook Diagnostic Error Codes
80
Power-On Self-Test
84
Table 3-4. POST Terminal-Error Beep Codes
84
Table 3-5. POST Messages
85
Sycard Pcctest 450 Cardbus Card (Optional)
87
Table 3-6. Sycard Pcctest Commands
87
Desktop Management Interface (DMI)
88
BIOS Setup Utility
89
Table 3-7. BIOS Setup Menus and Parameters
89
Replaceable Parts
93
Figure 4-1. Exploded View
94
Table 4-1. Omnibook Replaceable Parts
95
Table 4-2. Accessory Replaceable Parts
100
Table 4-3. Part Number Reference
101
Reference Information
109
Password Removal Policy
109
Hewlett-Packard Display Quality Statement
110
Table 5-1. Omnibook 6000/6100 LCD Guidelines
111
Service Notes and Obsolete Parts
112
Table 5-2. Obsolete Repair Parts
112
Advertisement
HP OmniBook 6100 Startup Manual (79 pages)
HP OmniBook 6100: User Guide
Brand:
HP
| Category:
Laptop
| Size: 0.55 MB
Table of Contents
Important Safety Information
3
Table of Contents
7
Getting Started with Your HP Notebook
9
Taking Inventory
10
What's in the Box
10
To Find more Information
11
Identifying Parts of the Computer
12
Front View
12
Back View
13
Bottom View
14
Status Lights
15
Setting up Your Computer
17
Step 1: Install the Battery
17
Step 2: Connect AC Power
19
Step 3: Connect a Phone Line
20
Step 4: Turn on the Computer
21
Step 5: Set up Windows
21
Step 6: Register Your Notebook
22
What to Do Next
23
To Connect to the Internet
23
Basic Operation
25
Operating Your Computer
26
To Turn the Computer on and off
26
To Reset the Computer
27
To Change the Boot Device
28
To Use the Pointing Devices
28
To Use the Fn Hot Keys
30
Working in Comfort with a Notebook PC
31
Batteries and Power Management
33
Using Battery Power
34
To Check Battery Status
34
To Respond to a Low-Battery Warning
35
To Recharge the Battery
35
Add-On Devices
37
Using Plug-In Modules
38
To Install Hot-Swap Support (Windows 98)
38
To Replace a Plug-In Module
39
Installing Additional RAM
41
To Install a RAM Expansion Module
41
Replacing the Hard Disk Drive
43
To Replace the Hard Disk Drive
43
Troubleshooting and Maintenance
45
Troubleshooting Your Computer
46
Display Problems
46
Hard Disk Drive Problems
47
Keyboard and Pointing Device Problems
47
Performance Problems
48
Power and Battery Problems
48
Startup Problems
49
Testing the Hardware
50
To Run the E-Diagtools Diagnostic Test
50
Configuring the Computer
52
To Run the BIOS Setup Utility
52
Reinstalling and Updating Software
53
To Recover the Factory Installation of Your Hard Disk
53
HP Support and Service
55
Getting Assistance for Your Computer
56
To Get Help from the Web
56
To Contact HP for Support or Service
56
To Receive Repair Service
59
To Prepare Your Computer for Shipment
59
Hewlett-Packard Limited Warranty Statement
60
Reference Information
63
Hardware Specifications
64
Safety Information
67
Power Cords
67
Ergonomics
68
Battery Safety
68
Laser Safety
69
LED Safety
69
Exposure to Radio Frequency Radiation
70
Regulatory Information
71
U.s.a
71
Canada
72
European Union
73
Japan
74
Russia
74
International
74
Startup Guide
75
Index
77
HP OmniBook 6100 Information (9 pages)
HP OmniBook 6100: Release Note
Brand:
HP
| Category:
Laptop
| Size: 0.02 MB
Advertisement
Related Products
HP OmniBook 6000 - Notebook PC
HP OmniBook 6100 - Notebook PC
HP OmniBook 6000
HP Omnibook 6200
HP OmniBook 600
HP Omnibook 6000 series
HP OMNIBOOK 3000
HP OmniBook 3100
HP OmniBook 4100
HP OMNIBOOK OmniBook 3000
HP Categories
Desktop
Laptop
Server
Monitor
Switch
More HP Manuals
Login
Sign In
OR
Sign in with Facebook
Sign in with Google
Upload manual
Upload from disk
Upload from URL