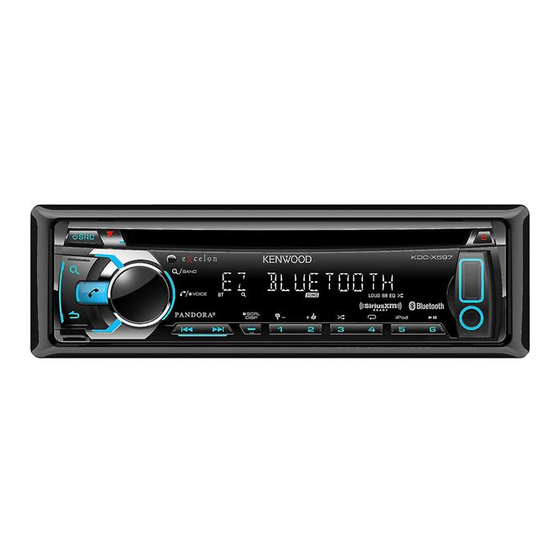
Kenwood KDC-X597 Instruction Manual
Cd-receiver
Hide thumbs
Also See for KDC-X597:
- Instruction manual (62 pages) ,
- Instruction manual (21 pages) ,
- Service manual (58 pages)
Table of Contents
Advertisement
KENWOOD
KDC-X597
KDC-BTSSSU
KDC-BT355U
CD-RECEIVER
INSTRUCTION MANUAL
AMPLI-TUNER LECTEUR DE CD
MODE D'EMPLOI
REPRODUCTOR DE DISCOS COMPACTOS RECEPTOR DE FM/AM
MANUAL DE INSTRUCCIONES
JVC KENWOOD Corporation
/IIIJI
Designed for
-lliil
Windows
~-™
Media™
Made for
~ iPod
C
iPhone
works with
PANDOR.A
Take the time to read through this instrudion manual.
Familiarity with installation and operation procedures will help you obtain the best performance from your new CO-receiver.
For your records
Record the serial number, found on the back of the unit, in the spaces designated on the warranty card, and in the space provided below. Refer to the model and serial
numbers whenever you call upon your Kenwood dealer for information or seNice on the product.
Model KDC-X597/ KDC-BTSSSU/ KDC-BT355U Serial number _ _ _ _ _ _
US Residents Only
Register Online
~:~: ~'>-: ~~,-~
:- . - -._- -
-
-
-
'
~
--._- --_ "--
~
.'
·--~-: ~'.:
;
-_
~~-~~ ~-· ~~-:~~:~:~~:~~:~~:~::.~:-~~f;~;~~:~5~~~~f~:::i~~::Ji
©
2012 JVC KENWOOD Corporation
GET0858-001 A (KW/KO)
Advertisement
Table of Contents

Summary of Contents for Kenwood KDC-X597
- Page 1 Record the serial number, found on the back of the unit, in the spaces designated on the warranty card, and in the space provided below. Refer to the model and serial numbers whenever you call upon your Kenwood dealer for information or seNice on the product.
-
Page 4: Getting Started
F/W UP YES: Starts upgrading the firmware.; NO: Cancels (upgrading is not activated). directly while in clock display screen. For details on how to update the firmware, see: www.kenwood.com/cs/ce/ Then, perform steps 5 and 6 above to set the clock. - Page 7 iPod --------------------------------- Preparation: Select [ON] for [BUILT-IN AUX] [BUILTIN AUX]. (-+ 4) While listening to iPod or KME Light/ KMC file ... 1 Press DIRECT. 1 Press the volume knob to enter [FUNGION]. 2 Press the number buttons to enter a track/file 2 Turn the volume knob to select [SETTINGS], then number.
- Page 9 SiriusXM™ If a locked channel or a mature channel ([MATURE CH] is set to [ON]) is selected, a Default XX pass code input screen appears. Enter the pass code to receive the channel. • To store a channel of the current band: Press and hold one of the number buttons (1 to 6).
-
Page 10: Connect The Microphone
BLUETOOTH® You can operate Bluetooth devices using this unit. • This unit supports Secure Simple Pairing (SSP). • Some Bluetooth devices may not automatically connect to the unit after pairing. Connect the device to the unit manually. Refer to the instruction manual of the Bluetooth device for more information. -
Page 11: Bluetooth Mode Operations
BLUETOOTH• Bluetooth mobile phone Press~ to enter Bluetooth mode. 2 Turn the volume knob to make a selection (see the following table), then Press~ or the volume knob or one of the number Receive a call press the knob. (or~ on RC-406). buttons Repeat step 2 until the desired item is selected. -
Page 14: Audio Settings
AUDIO SETTINGS While listening to any source ... PRESET EQ NATURAU USER/ ROCK/ POPS/ EASY/TOP40/ JAW POWERFUL: Selects [FUNGION]. Press the volume knob to enter a preset equalizer suitable to the music genre. (Select [USER] to use the [AUDIO CONTROL]/ [AUDIO GRL], 2 Turn the volume knob to select then press the customized bass, middle, and treble settings.) -
Page 15: Display Settings
DISPLAY SETTINGS 1 Press the volume knob to enter [FUNGION]. 2 Turn the volume knob to select [SETTINGS], then press the knob. DISP DIMMER ON: Dims the display illumination.; OFF: Cancels. 3 Turn the volume knob to make a selection (see the following table), then press the knob. -
Page 19: Specifications
SPECIFICATIONS •:olll$tr4/ 13•M=iieie1e11J: Frequency Range Version Bluetooth Ver.2.1 +EDR Certified 87.9 MHz to 107.9 MHz (200kHz space) Frequency Range 2.402 GHz to 2.480 GHz 13•M=iite1e11J: Output Power +4 dBm (MAX), 0 dBm (AVE) Power Class 87.5 MHz to 108.0 MHz (50 kHz space) ---------------------------------------------------------------------------------------------------------------- Maximum Communication Range Line of sight approx. - Page 20 lnstallating the unit (in-dash mounting) .... Bend the appropriate tabs to hold ..the mounting sleeve firmly in place . When installing without the mounting sleeve Remove the mounting sleeve and trim plate from "' the unit. Align the holes in the unit (on both sides) with the ~T!J vehicle mounting bracket and secure the unit with 8 mm...
-
Page 21: Wiring Connection
Purple/Black Extraction key To the terminal that is grounded when either -~------~------ Brown the telephone rings or during conversation. (To connect the Kenwood navigation system, refer your (Mute control wire) :...l ( x2) navigation manual.) Ignition switch Car fuse box ®... -
Page 22: Fcc Warning
• The Bluetooth® word mark and logos are registered trademarks owned by Bluetooth le brouillage est susceptible d'en compromettre le fonctionnement. SIG, Inc. and any use of such marks by JVC KENWOOD Corporation is under license. L'expression "IC:" avant le numero d'homologation/ enregistrement signifie seulement FCC WARNING Other trademarks and trade names are those of their respective owners. -
Page 23: Warranty Card
Thank you for purchasing this kenwood product. As mentioned in the pages of this booklet, our warranty is only Aten~ao: valid in the countries listed. If your country is not listed please contact your retailer for information on warranty... - Page 24 KENWOOD ELECTRONICS CANADA INC. (ci-apres appelee Cette garantie represente l'entiere garant~ donn!e !critpar 'BRASIL JVC KENWOOD DO BRASIL COMERCIO DE ELETRONICOS LTDA couran t.les m anques d 'entretiens p{lriodiques, KENWOOD. K ENWOO D ne fient aucunement responsable "KE NWOOD'),...


