Sign In
Upload
Manuals
Brands
Sony Manuals
Digital Camera
MVC-CD300
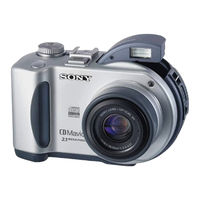
Sony MVC-CD300 Manuals
Manuals and User Guides for Sony MVC-CD300. We have
6
Sony MVC-CD300 manuals available for free PDF download: Service Manual, Operating Instructions Manual, Software Operating Instructions, Specifications
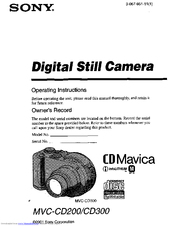
Sony MVC-CD300 Service Manual (132 pages)
DIGITAL STILL CAMERA
Brand:
Sony
| Category:
Digital Camera
| Size: 8.36 MB
Table of Contents
Table of Contents
3
Service Note
5
General
7
Introduction
7
Getting Started
7
Identifying the Parts
7
Preparing the Power Supply
7
Setting the Date and Time
9
Inserting a Disc
9
Basic Operations B Recording
10
Initializing a Disc (INITIALIZE)
10
Recording Still Images
10
Recording Moving Images
12
B Playback
12
Playing Back Still Images
12
Playing Back Moving Images
12
Preparation for Viewing Images Using a Computer
13
Viewing Images Using a Computer
14
Image File Storage Destinations and Image File Names
16
Advanced Operations
16
Before Performing Advanced Operations
16
How to Use the Mode Dial
16
How to Use the Control Button
17
How to Use the Jog Dial
17
Menu Settings
17
Setting the Image Size (IMAGE SIZE)
18
B Various Recording
19
Recording with the Exposure Fixed (AE LOCK)
19
Recording with the Manual Adjustments
19
Recording Images According to Shooting Conditions
20
(Scene Selection)
20
Recording Three Images Continuously (BURST)
20
Recording Still Images for E-Mail (E-MAIL)
20
Adding Audio Files to Still Images (VOICE)
20
Recording Text Documents (TEXT)
20
Recording Still Images as Uncompressed Files (TIFF)
21
Recording Three Images with the Exposure Shifted
21
Creating Clip Motion Files
21
Setting the Distance to the Subject
22
Recording Images in Macro
22
Adjusting the Exposure (EXPOSURE)
22
Adjusting the White Balance (WHITE BALANCE)
22
Enjoying Picture Effects (P. EFFECT)
22
Recording the Date and Time on the Still Image
23
(Date/Time)
23
Using the Spot Light-Metering Function
23
B Various Playback
23
Playing Back Three or Nine Images at Once
23
Enlarging a Part of the Still Image (Zoom and Trimming)
23
Playing Back the Still Images in Order (SLIDE)
24
Rotating a Still Image (ROTATE)
24
Viewing Images on a TV Screen
24
B Editing
24
Deleting Images (DELETE)
24
Preventing Accidental Erasure (PROTECT)
25
Changing the Recorded Still Image Size (RESIZE)
25
Selecting Still Images to Print (PRINT)
25
Formatting a CD-RW
26
Changing the Setup Settings (SET UP)
26
Additional Information
27
Precautions
27
On Discs
27
Using Your Camera Abroad
28
About "Infolithium" Battery Pack
28
Troubleshooting
28
Warning and Notice Messages
30
Self-Diagnosis Display
31
LCD Screen Indicators
31
Disassembly
32
Lcd Section (Pk-58 Board)
33
Cabinet (Front) Section
34
Lens Section (CD-333/334 Board)
35
Cabinet (Front) Assembly (Tk-61 Board), Control Switch Block (Rl-503)
36
Battery Holder (Jk-208 Board)
37
Board
37
Stroboscope Section (Flash Unit)
38
Base Unit (DDX-G2100 Complete Assembly)
39
Lid CD Section
40
Function Button (Fs-83 Board)
40
Solenoid Plunger
41
Control Switch Block (Zk-503)
42
Strap Shaft
42
Mode Knob, Power Spring
43
Circuit Boards Location
44
G2100 COMPLETE ASSEMBLY) Are Not Shown.
45
Flexible Boards Location
45
Disassembling Procedure of Mechanism Deck
45
Pages 2-15 and 2-16 Are Not Shown
45
Block Diagrams
46
Overall Block Diagram (1/2)
46
Overall Block Diagram (2/2)
47
Mode Control Block Diagram
48
Lcd Block Diagram
49
Power Block Diagram (1/3)
50
Power Block Diagram (2/3)
51
Power Block Diagram (3/3)
52
Pages from 3-15 to 3-26 Are Not Shown
52
Frame Schematic Diagram (1/2)
53
Frame Schematic Diagram (2/2)
53
Printed Wiring Boards and Schematic Diagrams
53
Printed Wiring Boards and
55
Lens Drive, Camera Process, CCD Imager) Printed Wiring Board (Cd200)
56
Lens Drive, Camera Process, CCD Imager
56
CCD Imager
60
67 And MD-083 Boards Are Not Shown.
61
Schematic Diagram and Printed Wiring Board of the SY- 12. Color Reproduction Adjustment····································5-20
61
Pages from 4-19 to 4-54 Are Not Shown
61
Charger
63
Rgb Drive, Timing Generator, Back Light) Printed Wiring Board
66
Rgb Drive)(1/3)
68
Timing Generator
69
Back Light)(3/3)
70
Waveforms
71
Mounted Parts Location
74
Adjusting Items When Replacing Main Parts and Boards
76
Adjustments
76
Adjustment
77
List of Service Tools
77
Preparations before Adjustment
77
Discharging of the Flashlight Power Supply
78
Preparations
78
Order of Adjustments
80
Precaution
80
Setting the Switch
80
Subjects
80
Initialization of D Page Data
81
Initializing the D Page Data
81
Modification of D Page Data
81
Initializing the B, E, F, 7, 9 Page Data
82
Modification of B, E, F, 7, 9 Page Data
82
Page Table
84
Page Table
85
Video Output Level Adjustment (SY-67 Board)
86
Video System Adjustments
86
Camera System Adjustments
87
HALL Adjustment (MVC-CD200)
87
Flange Back Adjustment
88
Flange Back Adjustment (Using Minipattern Box)
88
Flange Back Adjustment
89
(Using Flange Back Adjustment Chart)
89
Flange Back Adjustment (2)(MVC-CD200)
89
Flange Back Check
90
Picture Frame Setting
91
F No. Standard Data Input
92
Mechanical Shutter Adjustment
92
Light Value Adjustment
93
Mixed Color Cancel Adjustment
93
Auto White Balance Adjustment
94
Auto White Balance Standard Data Input
94
Color Reproduction Adjustment
95
Color Reproduction Check
95
White Balance Check
96
CCD Black Defect Compensation and Check
97
Strobe Adjustment
98
CCD White Defect Compensation and Check
97
LED Illumination Check
99
LCD Initial Data Input (1)
100
Lcd System Adjustment
100
LCD Initial Data Input (2)
101
VCO Adjustment (PK-58 Board)
101
Bright Adjustment (PK-58 Board)
102
D Range Adjustment (PK-58 Board)
102
Color Adjustment (PK-58 Board)
103
Contrast Adjustment (PK-58 Board)
103
V-COM Level Adjustment (PK-58 Board)
104
V-COM Adjustment (PK-58 Board)
104
White Balance Adjustment (PK-58 Board)
105
Battery End Adjustment (SY-67 Board)
106
Serial No. Input
107
System Control System Adjustment
106
Adjustment Remote Commander
108
Precautions Upon Using the Adjustment Remote
108
Commander
108
Service Mode
108
Using the Adjustment Remote Commander
108
Data Process
109
Bit Value Discrimination
110
Switch Check (1)
111
Service Mode
110
Setting the Test Mode
110
Switch Check (2)
111
Switch Check (3)
111
Switch Check (4)
112
Switch Check (5)
112
LED Check
112
Record of Use Check
113
Self Diagnosis Log Check
113
Exploded Views
114
Overall Section
114
Section (Cd200)
114
Section (Cd300)
115
Repair Parts List
114
Lens Section
117
Cabinet (Rear) Section-1
118
Cabinet (Rear) Section-2
119
Lid CD Section
120
Electrical Parts List
121
Pages from 6-14 to 6-24 Are Not Shown
125
Advertisement
Sony MVC-CD300 Operating Instructions Manual (129 pages)
Digital Still Camera
Brand:
Sony
| Category:
Digital Camera
| Size: 7.83 MB
Table of Contents
Table of Contents
5
Introduction
6
Identifying the Parts
7
Preparing the Power Supply
9
Setting the Date and Time
14
Initializing a Disc (INITIALIZE)
18
Recording Still Images
20
Recording Moving Images
26
Playing Back Still Images
28
Computer
35
Viewing Images Using a Computer
35
Image File Names
37
Before Performing
45
Advanced Operations
45
How to Use the Mode Dial
45
How to Use the Control Button
46
How to Use the Jog Dial
48
Menu Settings
49
(Image Size)
49
Various Recording
55
Recording with the Exposure Fixed (AE LOCK)
55
Recording with the Manual Adjustments
56
Recording Images According to Shooting Conditions
58
Recording Still Images for E-Mail
59
Recording Three Images Continuously
59
(Voice)
60
Recording Text Documents (TEXT)
61
Recording Still Images as Uncompressed
62
Files (TIFF)
64
Creating Clip Motion Files
64
Setting the Distance to the Subject
66
Adjusting the Exposure (EXPOSURE)
67
Adjusting the White Balance
68
(White Balance)
68
Recording the Date and Time on the Still Image (DATE/TIME)
70
Using the Spot Light-Metering Function
72
Various Playback
73
Playing Back Three or Nine Images at
73
Enlarging a Part of the Still Image (Zoom and Trimming)
74
Rotating a Still Image (ROTATE)
77
Viewing Images on a TV Screen
78
Deleting Images (DELETE)
79
Preventing Accidental Erasure (PROTECT)
80
Changing the Recorded Still Image Size (RESIZE)
82
Selecting Still Images to Print
83
Formatting a CD-RW
84
Changing the Setup Settings
86
(Set Up)
86
Precautions
89
On Discs
91
Using Your Camera Abroad
92
About "Infolithium" Battery Pack
93
Warning and Notice Messages
102
Self-Diagnosis Display
104
Specifications
105
LCD Screen Indicators
107
Index
110
Table of Contents
113
Introduction
114
Notes on Using Directcd
115
When Using a CD-R
115
When Using a CD-RW
115
Installing Directcd
116
Using Directcd
118
Modifying Data in a Disc
122
Sony MVC-CD300 Operating Instructions Manual (108 pages)
CD Mavica Digital Still Camera
Brand:
Sony
| Category:
Digital Camera
| Size: 3.55 MB
Table of Contents
Operating Instructions
1
The Camera
4
Table of Contents
5
Introduction
6
Getting Started
7
Identifying the Parts
7
Preparing the Power Supply
9
Charging the Battery Pack
10
Setting the Date and Time
14
Inserting a Disc
16
Removing the Disc
17
Basic Operations
18
B Recording
18
Initializing a Disc (INITIALIZE)
18
Recording Still Images
20
Digital Zoom Function
23
Using Digital Zoom
23
Recording Moving Images
26
B Playback
28
Playing Back Still Images
28
Playing Back Moving Images
29
Preparation for Viewing Images Using a Computer
31
What Is Finalization
32
Viewing Images Using a Computer
35
Image File Storage Destinations and Image File Names
43
Advanced Operations
45
Before Performing Advanced Operations
45
How to Use the Mode Dial
45
How to Use the Control Button
46
How to Use the Jog Dial
48
Menu Settings
49
Setting the Image Size (IMAGE SIZE)
53
B Various Recording
55
Recording with the Exposure Fixed
55
(Ae Lock)
55
Recording with the Manual Adjustments
56
Recording Images According to Shooting Conditions (SCENE SELECTION)
58
Recording Still Images for E-Mail (E-MAIL)
59
Recording Three Images Continuously (BURST) (Only for MVC-CD300)
59
Adding Audio Files to Still Images (VOICE)
60
Recording Text Documents (TEXT)
61
Recording Still Images as Uncompressed Files (TIFF)
62
Recording Three Images with the Exposure Shifted (Only for MVC- CD300) (EXP BRKTG)
63
Creating Clip Motion Files
64
Recording Images in Macro
66
Setting the Distance to the Subject
66
Adjusting the Exposure (EXPOSURE)
67
Adjusting the White Balance (WHITE BALANCE)
68
Enjoying Picture Effects
69
Recording the Date and Time on the Still Image (DATE/TIME)
70
Using the Spot Light-Metering Function
71
B Various Playback
72
Playing Back Three or Nine Images at Once
72
Enlarging a Part of the Still Image (Zoom and Trimming)
73
Playing Back the Still Images in Order (SLIDE)
74
Rotating a Still Image (ROTATE)
75
Viewing Images on a TV Screen
76
B Editing
77
Deleting Images (DELETE)
77
Preventing Accidental Erasure (PROTECT)
78
Changing the Recorded Still Image Size (RESIZE)
80
Selecting Still Images to Print (PRINT)
81
Formatting a CD-RW
82
Changing the Setup Settings (SET UP)
84
Additional Information
87
Precautions
87
On Discs
89
Using Your Camera Abroad
90
About "Infolithium" Battery Pack
91
Troubleshooting
93
Warning and Notice Messages
100
Self-Diagnosis Display
102
Specifications
103
LCD Screen Indicators
105
Index
108
Advertisement
Sony MVC-CD300 Service Manual (86 pages)
Brand:
Sony
| Category:
Digital Camera
| Size: 9.61 MB
Table of Contents
Table of Contents
2
2 Disassembly
3
MD-083 Board
4
3 Block Diagrams
5
Camera Block Diagram (1/2) (MVC-Cd200)
5
Camera Block Diagram (1/2) (MVC-Cd300)
6
4 Printed Wiring Boards and Schematic Diagrams
11
Schematic Diagrams
12
Printed Wiring Board
12
Pearl
15
Video out
16
16M Flash Memory, 64M Sdram, Clk Gen
18
Hi Control
20
Audio Process
21
Connector
22
DC/DC Converter
23
Printed Wiring Board
24
MD-083 (CD-Rf Process)
25
MD-083 (Servo)
28
MD-083 (CD Dsp, CD-R/Rw Ga)
29
4-3. Waveforms
30
4-4. Mounted Parts Location
30
Parts Location
31
6 Repair Parts List
32
6-1. Exploded Views
33
6-1-8. DDX-G2100 Complete Assembly
33
6-2. Electrical Parts List
34
Table of Contents
47
1 List of Service Tools
48
Save the Error Status
49
Analyze and Repair the Errors Due to Mechanical Causes
49
Analyze and Repair the Errors Due to Electrical Causes
49
3 Attaching the MD to the BU Adjustment Jig
50
4 Connecting the Equipment
52
Optical Power Meter
52
Jitter Meter
52
Troubleshooting
74
3. Troubleshooting the DDX-G2100
78
1 Laser Power Adjust
79
EEPROM Preset → NG
79
Cover Switch Check → NG
79
Read Power → NG
79
LD Initial Check → NG
79
2 SKEW Adjust → NG
80
3 Read (CD) Adjust
80
Adjust FE → NG
80
DPP (Differential Push-Pull: One of the Tracking Error Detection Methods) Balance → NG
80
TE Gain Offset → NG
80
Focus Gain, Tracking Gain → NG
80
MPP out Adjust → NG
80
RF Gain → NG (Judgment Is Not Performed.)
81
4 Write (CDR) Adjust
81
Jump Adjust → NG
81
Adjust WFB → NG (Judgment Is Not Performed.)
81
ATER (Absolute Time in Pre-Groove Error Rate) Check → NG
81
Focus Bias ATIP (Absolute Time in Pre-Groove) → NG (Judgment Is Not Performed.)
81
Read Asymmetry after ATER → NG
82
Self RF Jitter → NG (Judgment Is Not Performed.)
82
Seek Check → NG
82
5 Write (CDRW) Adjust
83
Focus Gain, Tracking Gain → NG
83
Erase Focus Gain → NG
83
Read Asymmetry after ATER → NG
84
BLER (Block Error Rate) Check → NG
84
Write Drive ID → NG (Judgment Is Not Performed.)
84
Revision History
86
Sony MVC-CD300 Software Operating Instructions (16 pages)
DirectCD
Brand:
Sony
| Category:
Digital Camera
| Size: 0.72 MB
Table of Contents
Notice for Users
2
Table of Contents
3
Introduction
4
Notes on Using Directcd
6
When Using a CD-R
6
When Using a CD-RW
7
Installing Directcd
8
Using Directcd
10
Starting Directcd
10
Writing Data to a Disc
11
Removing the Disc
12
When Using a CD-R
12
When Using a CD-RW
13
Modifying Data in a Disc
14
Writing more Data to a Disc
14
Deleting a File from a Disc
14
Sony MVC-CD300 Specifications (2 pages)
CD Mavica
Brand:
Sony
| Category:
Digital Camera
| Size: 0.27 MB
Advertisement
Related Products
Sony MVC-CD200
Sony CD Mavica MVC-CD400
Sony CD Mavica MVC-CD500
Sony Mavica MVC-CD1000
Sony CD Mavica MVC-CD250
Sony MVCCD300 - 3MP Digital Camera
Sony MVC CD1000 - Mavica 2.1MP Digital Camera
Sony MVCCD250 - 2MP CD Mavica Digital Camera
Sony MVC-CDZOO/CD300
Sony MVC-CD2OO
Sony Categories
Laptop
TV
CD Player
Camcorder
Digital Camera
More Sony Manuals
Login
Sign In
OR
Sign in with Facebook
Sign in with Google
Upload manual
Upload from disk
Upload from URL