Sign In
Upload
Manuals
Brands
Husqvarna Manuals
Sewing Machine
Viking Epic 3
Husqvarna Viking Epic 3 Manuals
Manuals and User Guides for Husqvarna Viking Epic 3. We have
3
Husqvarna Viking Epic 3 manuals available for free PDF download: User Manual, User Instructions
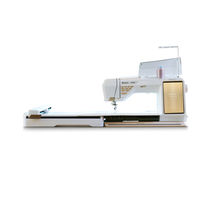
Husqvarna Viking Epic 3 User Manual (170 pages)
Brand:
Husqvarna
| Category:
Sewing Machine
| Size: 11.76 MB
Table of Contents
Table of Contents
6
Introduction
11
Learn more
12
Machine Overview
12
Front
12
Needle Area
13
Left Side
13
Right Side
13
Rear
13
Accessory Tray
14
Function Buttons
15
Accessories
17
Included Accessories
17
Included Accessories Not in Picture
17
Included Hoops
17
Presser Feet
18
Stitch Overview
20
Utility Stitches 1, Basic Stitches
20
Utility Stitches 2, Appliqué & Mending
21
Utility Stitches 3, Buttonholes
22
Stitch Menu Overview
24
Alphabets
24
Preparations
25
Unpacking Machine and Embroidery Unit
26
Connecting the Power Cord and Foot Control
26
Packing Away after Sewing
27
USB Ports
27
Using a USB Device
27
LED Lights
27
Free Arm
27
Manual Thread Cutter
28
Thread Sensor
28
Speed Control Slider
28
Telescopic Thread Guide
28
Spool Pins
29
Spool Caps
29
Threads
29
Needles
31
Important Needle Information
31
Changing the Needle
32
Threading
33
Threading the Upper Thread
33
Automatic Needle Threader
35
Threading for Twin Needle
37
Threading Tips and Hints
39
Bobbin Winding
40
Winding through the Needle
41
Inserting the Bobbin
42
Integrated Dual Feed (IDF) System
43
Engaging the IDF System
43
Disengaging the IDF System
43
Changing the Presser Foot
43
Attaching the Sensor One-Step Buttonhole Foot
44
Attaching the Sensor Q-Foot
44
Changing the Needle Plate
45
Storing a Needle Plate
45
Getting Started with Wifi and Mysewnet Cloud
46
Embroidery Preparations
47
Embroidery Unit Overview
48
Embroidery Unit Extension Overview
48
Large Hoop Support Overview
48
Embroidery Hoop Overview
48
Sensor Q-Foot
49
Straight Stitch Plate
49
Embroidery Designs
49
Connecting the Embroidery Unit
50
Removing the Embroidery Unit
51
Using the Embroidery Unit Extension and Large Hoop Support
51
Attach the Embroidery Unit Extension
51
Attach the Large Hoop Support
52
Removing the Embroidery Unit Extension and Large Hoop Support
52
Hooping the Fabric
53
Attaching and Removing the Hoop
54
Using the Hoop Adapter
54
The Multi-Touch Screen
55
Main Functions
56
Home
56
Save
56
Mode Switch
56
Quick Help
57
Common Functions
57
Top Bar
58
Secondary Top Bar
58
Recommendations
58
Information
58
Active Features
58
Wifi & Mysewnet Services
59
Wifi Introduction
60
Getting Started with Wifi
60
Firmware Updates
60
Firmware Update Using Wifi
60
Firmware Update Using a USB Device
61
Mysewnet Services
61
Mysewnet Cloud
61
Mysewnet Library
61
Mysewnet Blog
61
Project Creator
62
Free Mysewnet Embroidery Software (PC and MAC)
62
Apps
62
Home Screen
63
Home Screen- Overview
64
Edit Machine Nickname
65
User Profile
65
Sewing/Embroidery - Start New Session
65
Continue from Saved State
65
Mysewnet™ Blog
65
User's Guide
65
Joyos ADVISOR
66
Sewing
67
Quilting
68
Embroidery
68
Get Started
68
Advanced Features
68
Accessories
68
Needles
68
Stabilizers
69
Project Viewer
70
Sewing
71
Sewing Mode - Overview
72
Load a Stitch
73
Projection - Overview
73
Projection Options
74
Stitch Preview
74
Grid
75
Stitch Guidelines
75
Information and Sewing Recommendations
76
Presser Foot Recognition
76
Stitch Settings
76
Stitch Width
77
Stitch Positioning
77
Stitch Length
77
Stitch Density
77
Mirroring
77
Buttonhole Slit Length
77
Button Stitch Repetition
78
Deluxe™ Stitch System
78
Presser Foot Pressure
79
Balance
79
Free Motion Options
79
Tie-Off Options
80
Save Stitch
81
Sewing Programs
81
Stitch Repeat
81
Patchwork Program
82
Single Stitch Program
82
Combining Programs
82
Sewing Techniques
83
Seam
83
Overcast
83
Seam and Overcast
83
Baste
83
Blind Hem
84
Hem
84
Buttonholes
85
Programmable Button Sew on
86
Tapering Stitches
86
4-Way Stitches
87
Special Stitches for Optional Presser Feet
87
Exclusive Sewing Techniques
87
Motif Builder Stitches
87
Dimensional Stitches
87
Theme Stitches
88
Embellished Stitches
89
Floating Stitches
89
Guided Pictograms
89
Pop-Up Messages in Sewing
89
Stitch Creator™ Feature
91
Stitch Creator™ Feature - Overview
92
Getting Started with Stitch Creator
93
Definition of a Stitch Point
93
Select Stitches/Stitch Points
93
Preview
93
Edit Stitch in Stitch Creator
94
Zoom Options
94
Move
94
Duplicate Selected Stitch Point
94
Delete Selected Stitch Point
94
Mirroring
94
Triple Stitch
94
Add a Stitch or Stitch Point
95
Pop-Up Messages in Stitch Creator™ Feature
95
Embroidery Edit
97
Embroidery Edit - Overview
98
Load a Design
99
Mysewnet Library
99
Load a Font
99
Load a Stitch
100
Load Saved Files
100
Color Edit
101
Change Color
102
Layers
102
Select Designs/Change Stitch-Out Order
103
Select All
103
Select Multiple
103
Group/Ungroup
103
Edit Functions
103
Move
104
Rotate
104
Scale
104
Duplicate/Multi Duplicate
104
Delete/Delete All
105
Mirroring
105
Move into Hoop
105
Undo/Redo
105
Pan
105
Zoom Options
106
Hoop Options
106
Select Hoop
106
Scan Hoop
107
Background
107
Grid Options
107
Alignment
107
Background Color
107
Mysewnet Send Design
107
Edit Stitch
108
Resize
108
Resize Adjustments
108
Embroidery Text
110
Create a Text
110
Add a Letter
110
Delete a Letter
110
Text Shaping
110
Create Shape
112
Set Number of Designs/Stitches
113
Create Appliqué
114
Load Autofill Stitch
115
Positioning in Create Shape/Create Appliqué
115
Select Spacing
115
Select Line Positioning
115
Select Side Positioning
115
Fixed Design Angle
116
Control Points
116
Save Design
116
Pop-Up Messages in Embroidery Edit
116
10 Embroidery Stitch-Out
119
Embroidery Stitch-Out - Overview
120
Review the Embroidery Stitch-Out Settings
121
Color Block List
123
Basting Options
123
Ghost Mode
123
Color Block Sort
123
Color Block Merge
123
One Color
124
Stitch-Out Progress
124
Remaining Embroidery Time
124
Number of Stitches in Embroidery Combination
124
Step Stitch-By-Stitch / Go to Stitch
124
Corner Check
124
Deluxe™ Stitch System
125
Zoom Options
125
Hoop Position
125
Current Stitch Position
125
Park Position
125
Trim Position
125
Center Position
125
Exact Position
126
Zoom Options
126
Set Cursor Point
126
Exact Position Exercise
126
Projection in Embroidery Stitch-Out
127
Save Current State/Restore Current State
128
Auto Save
128
Pop-Up Messages in Embroidery Stitch-Out
129
11 Sequence
131
Sequence - Overview
132
Getting Started with Sequence
133
Directional Stitches
133
Edit and Adjust Your Sequence
134
Sequence Commands
134
Saving a Sequence
135
Sew or Embroider Your Sequence
135
Adjust the Entire Sequence
135
Using Sequence in Sewing Mode and Embroidery Edit
135
Pop-Up Messages in Sequence
135
12 Settings
137
Sewing Settings
138
Deluxe™ Stitch System
138
Automatic Presser Foot Lift
138
Automatic Thread Cutter
138
Free-Motion Options
138
Stitch Limiting Options
139
Needle Stop Position
139
Presser Foot Pressure
139
Options for Feed Teeth
139
Tie-Off Options
139
Embroidery Settings
140
Deluxe™ Stitch System
140
Embroidery Foot Type
140
Twin Needle Options
140
Thread Cut Options
141
Presser Foot Height Embroidery
141
Select Default Hoop Size
141
Review Embroidery Settings
141
Display & Audio Settings
142
Language
142
Time Format
142
Time Zone
142
Audio Volume
142
Audio Repeat
142
LED Work Light Brightness
142
Units
142
Personalize Settings
143
Machine Nickname
143
Color Themes
143
Bottom Bar Text
143
Customize Your Workspace
143
Lock Screen
143
Show Demo Mode
143
Play Feature Videos as Screensaver
143
Wifi Settings
144
Mysewnet Settings
145
Camera and Projection Settings
146
Presser Foot Recognition
146
Adjust Camera
146
Adjust Projection
146
Machine Information
147
13 File Manager
149
File Manager - Overview
150
File Formats
151
Browse File Manager
151
Open a File or Folder
151
Select Multiple
151
Mysewnet Folder
151
USB Device
152
List/Thumbnail View
152
Move up One Folder Level
152
Organize
152
Create New Folder
152
Rename a File or Folder
152
Move a File or Folder
153
Copy a File or Folder
153
Delete a File or Folder
153
Pop-Up Messages in File Manager
154
14 Maintenance
155
Cleaning the Machine Exterior
156
Removing the Needle Plate and Cleaning the Bobbin Area
156
Cleaning under the Bobbin Area
156
Replacing the Needle Plate
156
Troubleshooting
157
Service
161
Non-Original Parts and Accessories
161
Technical Specification
161
Index
163
Advertisement
Husqvarna Viking Epic 3 User Instructions (2 pages)
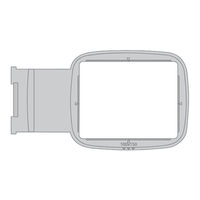
FREE ARM EMBROIDERY HOOP 150x100mm
Brand:
Husqvarna
| Category:
Sewing Machine
| Size: 0.35 MB
Husqvarna Viking Epic 3 User Instructions (2 pages)
SPECIAL TECHNIQUES HOOP 240X150mm
Brand:
Husqvarna
| Category:
Sewing Machine
| Size: 0.37 MB
Advertisement
Advertisement
Related Products
Husqvarna Eden Rose 250M LIMITED EDITION
Husqvarna VIKING Viva
Husqvarna Viking Huskylock 90
Husqvarna Viking Platinum 730
Husqvarna Viking Platinum 3000
Husqvarna Viking Designer Diamond
Husqvarna Viking Quilt Designer II
Husqvarna Viking Platinum MN 1000
Husqvarna Viking 3600
Husqvarna Viking Amber Air S 400
Husqvarna Categories
Lawn Mower
Trimmer
Chainsaw
Motorcycle
Saw
More Husqvarna Manuals
Login
Sign In
OR
Sign in with Facebook
Sign in with Google
Upload manual
Upload from disk
Upload from URL