Sign In
Upload
Manuals
Brands
Honeywell Manuals
DVR
FUSION III DVR
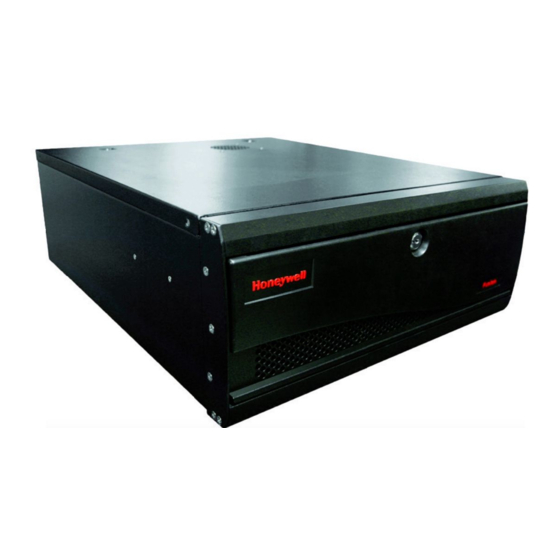
Honeywell FUSION III DVR Manuals
Manuals and User Guides for Honeywell FUSION III DVR. We have
3
Honeywell FUSION III DVR manuals available for free PDF download: User Manual
Honeywell FUSION III DVR User Manual (150 pages)
Digital Recording and Transmission System
Brand:
Honeywell
| Category:
DVR
| Size: 3.72 MB
Table of Contents
Warnings and Safeguards
3
Rack Mount Instructions
6
Important Safeguards
8
Notes on Handling
9
Notes on Locating
9
Notes on Maintenance
10
Notes on Moisture Condensation
10
Table of Contents
13
Contents
13
Introduction
19
Product Description
19
Features
20
Controls and Connections
21
Basic Features
21
Front Panel Controls and LEDS
22
Rear Panel Connectors
23
32 Channel
23
8/16 Channel
24
PCI Card Configurations
25
120 IPS 16 Channel
25
240 IPS 8/16 Channel
25
240 IPS 32 Channel
25
480 IPS 16 Channel
26
480 IPS 32 Channel
26
Getting Started
27
Identifying Included Components
27
Keyboard Setup
28
Mouse Setup
28
Monitor Setup
29
Power Setup
29
Connecting a Video Source to the DVR
30
Looping Outputs
31
Looping Output Termination
32
Connecting Sensors to the DVR
32
Connecting Control Outputs to the DVR
33
Connecting a 16 Channel Audio Input Cable
33
Connecting a PTZ Camera
34
Attaching the Four-Wire PTZ Adapter
34
Attaching the Two-Wire PTZ Adapter
35
Optional Components
35
Turning on the DVR
36
Turning off the DVR
36
DVR Basics
37
Live View Screen
37
Camera View
38
Recording Status Indicator
38
Special Recording
38
Live Camera Options
39
Camera Display Menu
39
Setup Options
41
Setup Overview
41
Setup Screen
42
Camera Setup
43
Setup New Camera
43
Network Video Setup
44
Connecting a Network Device
44
Connecting Manually
44
Connecting with Camera Finder
45
Assigning a Network Device to a Channel
45
Assigning Audio Channels to a Network Device
46
Camera Configuration
47
Displaying more Columns
47
Accessing the Device Configuration Menu
47
Motion
48
Regular Interval Recording
48
Enable Sabotage Detection
48
Creating a Motion Area
49
Removing a Motion Area
49
General Setup
50
Voice Warning
51
Intensive Recording Overview
51
Enabling Intensive Recording
51
Video Loss Alarm
52
4 B T V-Out Setup (Analog)
52
4 B T V-Out Setup (Multiplexer)
53
Configure Sequence Mode
53
Control Sequence Mode Display
53
Control Multiplexer Mode Display
54
Connecting to a Wide Screen Display
54
Audio Recording
55
Enabling Audio Recording
55
Enabling Live Audio
55
Frame Setup
56
Frame Setup (Real Time)
57
Frame Setup (Non Real Time)
58
IPS Breakdown for each Resolution (NTSC)
59
IPS Breakdown for each Resolution (PAL)
59
Recording Schedule Setup
60
Day of the Week
61
Creating a Simple Schedule (by Example)
61
Scheduling Sensors and Relays (by Example)
65
Verifying a Recording Schedule
69
Sensor Setup
70
Configure Sensor Response
70
Activate PTZ Preset on Sensor
71
Network Setup
72
Administration
73
Disk Management
74
Log Management
74
Setup Log Management Options
74
User Management
75
Add a New User
75
User Rank
76
Changing the Administrator Password
76
Default Administrator Password
76
Status Check / Email
77
General
77
Users
77
Storage Check
78
Recording Data Check
78
SMART Information
78
SMART Alert
79
Alarm Event
79
Data Management
79
Information
80
Ptz
80
Instant Recording
81
Activate Instant Recording
81
Searching 'Instant Recorded' Video
81
Adjusting the Time, Date and Time Zone
82
LDAP User and Permission Integration
83
Active Directory Initial Setup
83
DVR LDAP Setup
83
DVR LDAP Setup Continued
84
Creating LDAP Groups
84
Deleting LDAP Groups
85
Creating LDAP Users
85
Deleting LDAP Users
85
Changing LDAP Server
85
Central User Management (Optional)
86
Central User Management Window
87
Setting up the Central User Management Server
87
DVR Management
88
User Management
88
Select Site
89
Enabling a DVR to Use Central User Management
89
Search Options
91
Search Overview
91
Play Controls
92
Hour / Minute Control
92
Brightness / Speed / Zoom
93
Adjusting the Brightness of an Image
93
Zooming in on an Image
93
Zooming in on a Portion of an Image
93
After Image Removal
94
Time Sync
94
Search Options Overview
94
Performing a Basic Search
95
Daylight Saving Time
95
Printing an Image
95
Save Function
96
Bookmarks
97
Modify Bookmarks
97
Single Clip Backup
98
Single Clip Backup Using Bookmark Data
98
Index Search
99
Index Search Results Display
99
Preview Search
100
Performing a Preview Search
101
Object Search
102
Performing an Object Search
102
Status Search
103
Performing a Status Search
103
Motion Search
104
Performing a Motion Search
104
Audio
104
Pan / Tilt / Zoom
105
Pan / Tilt / Zoom Overview
105
Setting up a PTZ Camera
105
Supported Protocols
106
Advanced PTZ Setup
107
Creating and Viewing Preset Positions
108
Creating a Preset
108
Viewing a Preset
108
Understanding Tours
109
Creating a Preset Tour
109
Viewing the Preset Tour
109
Creating a Preset Tour2
110
Viewing the Preset Tour2
110
Creating a MIMIC Tour
110
Viewing the MIMIC Tour
110
PTZ Status on Close
110
Activating the PTZ Status on Close Option
111
PTZ Tour Scheduling
111
Creating a PTZ Tour Schedule
111
PTZ Address Setting
112
Accessing PTZ Menus
112
Opening and Editing the Honeywell MAXPRO Menu
112
Controlling a PTZ Camera
113
Using the On-Screen Compass
113
Using the PTZ Controller
114
AUX Buttons
114
Backing up Video Data
115
Backup Overview
115
Nero® Express
115
Backup Center Overview
115
General Screen Overview
116
Performing a General Backup
116
Clip Screen Overview
117
Performing a Clip Backup
117
Scheduled Backup Overview
118
Performing a Scheduled Backup
118
Specifying Scheduled Backup Drives
118
LAN / ISDN / PSTN Connections
119
LAN Overview
119
Connecting to a LAN Using TCP/IP
119
Configuring TCP/IP Settings
120
Event Sentry
121
Overview
121
Setup Event Sentry
121
Add Email Notification Filters
121
Honeywell Video Analytics Integration
123
Overview
123
Important Notes
123
Log in to Honeywell Video Analytics Configuration
124
Add the Fusion Server Login to Honeywell Video Analytics
124
Set up Honeywell Video Analytics Communication
125
Honeywell Video Analytics Modules
126
Launch Honeywell Video Analytics Modules
126
Video Analytics Alert Setup
127
Create a Video Analytics Alarm Schedule
127
Create a Video Analytics Alert
128
Searching for Honeywell Video Analytics Events
129
The Web Viewer
131
Web Viewer Overview
131
Configuring the Server for Remote Connection
132
Connecting to a DVR Using Web Viewer
132
Closing the Web Viewer
132
Included Software Setup
133
Proprietary Viewer Overview
133
Installing the Proprietary Viewer
134
Loading Video from CD-ROM or Hard Drive
134
Digital Verifier Overview
135
Installing the Digital Verifier
135
Using the Digital Verifier
135
Alarm Monitor Overview
136
Installing the Alarm Monitor
136
Configuring the DVR
136
Configuring the Client PC
137
Alarm Monitor Window
138
Filter Event List
138
Search Alarm Window
139
View Recorded Video
139
Export Video
139
Fusion Remote Software Overview
140
Remote Client Minimum Requirements
141
Remote Client Recommended Requirements
141
Installing the Fusion Remote Software
141
Setting up the Server to Accept Incoming Communications
142
Setting up the Fusion Remote Software
143
Creating a New Remote Connection
143
FVMS Overview
144
Configuring the Server for Remote Connection
144
Connecting to a DVR
144
Health Check
145
Enable Health Check on the Fusion DVR
145
Technical Specifications
147
Fusion III 120 IPS
147
Fusion III 240 IPS & 480 IPS
148
Advertisement
Honeywell FUSION III DVR User Manual (164 pages)
Digital Recording and Transmission System
Brand:
Honeywell
| Category:
Recording Equipment
| Size: 3.94 MB
Table of Contents
User Guide
1
Warnings and Safeguards
3
Fcc Compliance Statement
3
Rack Mount Instructions
6
Important Safeguards
9
Notes on Handling
10
Explanation of Graphical Symbols
12
Table of Contents
13
Contents
14
Introduction
19
Product Description
19
Features
20
Controls and Connections
21
Basic Features
21
Front Panel Controls and Leds
22
Rear Panel Connectors
23
32 Channel
23
8/16 Channel
24
PCI Card Configurations
25
120/100 IPS 16 Channel
25
120R/100R IPS 16 Channel
25
240/200 IPS 8/16 Channel
25
240/200 IPS 32 Channel
26
480/400 IPS 16 Channel
26
Getting Started
29
Identifying Included Components
29
Keyboard Setup
30
Mouse Setup
30
Monitor Setup
31
Power Setup
31
Connecting a Video Source to the DVR
32
Looping Outputs
33
Looping Output Termination
34
Connecting Sensors to the DVR
34
Connecting Control Outputs to the DVR
35
Connecting a 16 Channel Audio Input Cable
35
Connecting a PTZ Camera
36
Attaching the Four-Wire PTZ Adapter
36
Attaching the Two-Wire PTZ Adapter
37
Optional Components
37
Turning on the DVR
38
Turning off the DVR
38
DVR Basics
41
Display Screen
41
Camera View
42
Recording Status Indicator
42
Special Recording
42
Live Camera Options
43
Camera Display Menu
43
Setup Options
45
Setup Overview
45
Setup Screen
46
Camera Setup
47
NVR/HVR Upgrade and Registrations
48
Obtaining the Unlock Code
48
Unlocking a New Network Device
49
Connecting a Network Device
50
Motion
51
Regular Interval Recording
51
Enable Sabotage Detection
51
Creating a Motion Area
52
Removing a Motion Area
52
General Setup
53
Voice Warning
54
Intensive Recording Overview
54
Enabling Intensive Recording
54
Video Loss Alarm
55
4 B T V-Out Setup (Analog)
55
4 B T V-Out Setup (Multiplexer)
56
Configure Sequence Mode
56
Control Sequence Mode Display
56
Control Multiplexer Mode Display
57
Audio Recording
58
Enabling Audio Recording
58
Enabling Live Audio
58
Frame Setup
59
Frame Setup (Real Time)
60
Frame Setup (Non Real Time)
61
IPS Breakdown for each Resolution (NTSC)
62
IPS Breakdown for each Resolution (PAL)
62
Recording Schedule Setup
63
Day of the Week
64
Creating a Simple Schedule (by Example)
64
Scheduling Sensors and Relays (by Example)
68
Verifying a Recording Schedule
72
Sensor Setup
73
Network Setup
74
Administration
75
Disk Management
76
Log Management
76
Setup Log Management Options
76
User Management
77
Add a New User
77
User Rank
78
Changing the Administrator Password
78
Default Administrator Password
78
Status Check / Email
79
General
79
Users
79
Storage Check
80
Recording Data Check
80
SMART Information
81
SMART Alert
81
Alarm Event
81
Site Information
82
Ptz
82
Instant Recording
83
Activate Instant Recording
83
Searching 'Instant Recorded' Video
83
Adjusting the Time, Date and Time Zone
84
Central User Management (Optional)
85
Central User Management Window
86
Setting up the Central User Management Server
86
DVR Management
87
User Management
87
Select Site
88
Enabling a DVR to Use Central User Management
88
Search Options
91
Search Overview
91
Play Controls
92
Hour / Minute Control
92
Brightness / Speed / Zoom
93
Adjusting the Brightness of an Image
93
Zooming in on an Image
93
Zooming in on a Portion of an Image
93
After Image Removal
94
Time Sync
94
Search Options Overview
94
Performing a Basic Search
95
Daylight Saving Time
95
Printing an Image
95
Save Function
96
Single Clip Backup
97
Index Search
98
Index Search Results Display
98
Preview Search
99
Performing a Preview Search
100
Object Search
101
Performing an Object Search
101
Status Search
102
Performing a Status Search
102
Audio
103
Pan / Tilt / Zoom
107
Pan / Tilt / Zoom Overview
107
Setting up a PTZ Camera
107
Supported Protocols
108
Advanced PTZ Setup
109
Creating and Viewing Preset Positions
110
Creating a Preset
110
Viewing a Preset
110
Understanding Tours
111
Creating a Preset Tour
111
Viewing the Preset Tour
111
Creating a Preset Tour2
112
Viewing the Preset Tour2
112
Creating a MIMIC Tour
112
Viewing the MIMIC Tour
112
PTZ Status on Close
112
Activating the PTZ Status on Close Option
113
PTZ Tour Scheduling
113
Creating a PTZ Tour Schedule
113
PTZ Address Setting
114
Accessing PTZ Menus
114
Opening and Editing the Honeywell MAXPRO Menu
114
Controlling a PTZ Camera
115
Using the On-Screen Compass
115
Using the PTZ Controller
116
AUX Buttons
116
Backing up Video Data
119
Backup Overview
119
Nero® Express
119
Backup Center Overview
119
General Screen Overview
120
Performing a General Backup
120
Clip Screen Overview
121
Performing a Clip Backup
121
Scheduled Backup Overview
122
Performing a Scheduled Backup
122
Specifying Scheduled Backup Drives
122
LAN / ISDN / PSTN Connections
125
LAN Overview
125
Connecting to a LAN Using TCP/IP
125
Configuring TCP/IP Settings
126
Event Sentry
129
Overview
129
Setup Event Sentry
129
Add Email Notification Filters
129
Honeywell Video Analytics Integration
133
Overview
133
Important Notes
133
Log in to Honeywell Video Analytics Configuration
134
Add the Fusion Server Login to Honeywell Video Analytics
134
Set up Honeywell Video Analytics Communication
135
Honeywell Video Analytics Modules
136
Launch Honeywell Video Analytics Modules
136
Video Analytics Alert Setup
137
Create a Video Analytics Alarm Schedule
137
Create a Video Analytics Alert
138
Searching for Honeywell Video Analytics Events
139
The Web Viewer
141
Web Viewer Overview
141
Configuring the Server for Remote Connection
142
Connecting to a DVR Using Web Viewer
142
Closing the Web Viewer
142
Included Software Setup
145
Proprietary Viewer Overview
145
Installing the Proprietary Viewer
146
Loading Video from CD-ROM or Hard Drive
146
Digital Verifier Overview
147
Installing the Digital Verifier
147
Using the Digital Verifier
147
Alarm Monitor Overview
148
Installing the Alarm Monitor
148
Configuring the DVR
148
Configuring the Client PC
149
Alarm Monitor Window
150
Filter Event List
150
Search Alarm Window
151
View Recorded Video
151
Export Video
151
Fusion Remote Software Overview
152
Remote Client Minimum Requirements
153
Remote Client Recommended Requirements
153
Installing the Fusion Remote Software
153
Setting up the Server to Accept Incoming Communications
154
Setting up the Fusion Remote Software
155
Creating a New Remote Connection
155
FVMS Overview
156
Configuring the Server for Remote Connection
156
Connecting to a DVR
156
Health Check
157
Enable Health Check on the Fusion DVR
157
Technical Specifications
159
FUSION III 8-Channel
159
FUSION III 16-Channel
160
FUSION III 32-Channel
161
Honeywell FUSION III DVR User Manual (168 pages)
Digital Recording and Transmission System
Brand:
Honeywell
| Category:
DVR
| Size: 4.68 MB
Table of Contents
Rack Mount Instructions
6
Notes on Maintenance
11
Notes on Moisture Condensation
11
Table of Contents
15
Section 1 Introduction
21
Product Description
21
Features
22
Section 2 Controls and Connections
23
Basic Features
23
Front Panel Controls and Leds
24
Rear Panel Connectors
25
Section 3 Getting Started
27
Identifying Included Components
27
Keyboard Setup
28
Mouse Setup
28
Monitor Setup
29
Power Setup
29
Connecting a Video Source to the Dvr
30
Looping Outputs
31
Looping Output Termination
32
Connecting Sensors to the Dvr
32
Connecting Control Outputs to the Dvr
33
Connecting a 16 Channel Audio Octopus Cable
34
Optional Components
34
Section 4 Dvr Basics
35
Turning on the Dvr
35
Turning off the Dvr
35
Nvr/Hvr Upgrade and Registration
35
Obtaining the Unlock Code
36
Unlocking Your New Network Device
38
Display Screen
39
Camera View
40
Recording Status Indicator
41
Screen Division Menu
42
Section 5 Setup Options
45
Setup Overview
45
Setup Screen Overview
45
Camera Setup
46
Connecting a Network Device
47
Motion
48
Creating a Motion Area
49
Removing a Motion Area
49
Regular Interval Recording
50
General Setup
51
Voice Warning
52
Intensive Recording Overview
53
How to Use Intensive Recording
53
Video Loss Alarm
54
Audio Recording
55
Frame Setup
56
Frame Setup (High-End)
56
Frame Setup (Low-End)
58
Recording Schedule
60
Day of the Week
62
Creating a Simple Schedule (by Example)
62
Scheduling Sensors and Relays (by Example)
66
Verifying a Recording Schedule
70
Sensor Setup
71
Network Setup
72
Administration
74
User Management
75
User Rank
76
Changing the Administrator Password
76
Storage Check
78
Site Information
80
Ptz
81
Instant Recording
81
Adjusting the Time, Date, and Time Zone
82
Central User Management (Optional)
83
Site Management
85
User Management
86
Select Site
87
Setting up the Central Management User Server
87
Enabling a Dvr to Use Central User Management
88
Section 6 Search Options
89
Search Overview
89
Play Controls
91
Hour / Minute Selector
91
Brightness / Speed / Zoom
92
Adjusting the Brightness of an Image
92
Zooming in on an Image
92
Zooming in on a Portion of an Image
92
After Image Removal
93
Search Options Overview
94
Performing a Basic Search
94
Daylight Savings Time
95
Time Sync
95
Printing an Image
96
Save To' Function
96
Single Clip Backup
98
Index Search
99
Performing an Index Search
99
Preview Search
101
Performing a Preview Search
102
Object Search
103
Performing an Object Search
105
Status Search
106
Performing a Status Search
107
Audio
107
Point of Sale (Optional)
108
Section 7 Pan / Tilt / Zoom
109
Pan / Tilt / Zoom Overview
109
SETTING up a PTZ CAMERA (120IPS Realtime / 240IPS / 480IPS)
109
Supported Protocols
111
Setting up a Ptz Camera (60Ips /120Ips)
112
Advanced Ptz Setup
113
Creating and Viewing Preset Positions
115
Creating a Preset
116
Viewing a Preset
116
Understanding Tours
117
Creating a Preset Tour
118
Viewing the Preset Tour
118
Creating a Preset Tour2
118
Viewing the Preset Tour2
118
Creating a MIMIC Tour
119
Viewing the MIMIC Tour
119
Ptz Tour Scheduling
120
Ptz Status on Close
121
Activating the Ptz Status on Close Option
121
Ptz Address Setting
122
Activating the Ptz Status on Close Option
122
ACCESSING PTZ Menus
123
Opening and Editing the Honeywell Kd6 Menu
123
Using the On-Screen Controller and Compass
124
The Ptz Controller
125
Aux Buttons
126
Section 8 Backing up Video Data
127
Backup Overview
127
Nero® Express
127
Backup Center Overview
128
General Screen Overview
128
Clip Screen Overview
130
Performing a Regular Backup
131
Performing a Clip Backup
131
Performing a Schedule Backup
132
Specifying Scheduled Backup Drives
132
Enabling Scheduled Backup
133
Section 9 Lan / Isdn / Pstn Connections
135
Lan Overview
135
Connecting to a Lan Using Tcp/Ip
135
Configuring Tcp/Ip Settings
136
Connecting the Dvr to a Lan
136
Section 10 Digital Signature Verifier
137
Digital Verifier
137
Installing the Digital Verifier
137
Using the Digital Verifier
138
Section 11 Proprietary Viewer
139
Proprietary Viewer Overview
139
Installing the Proprietary Viewer
140
Loading Vide0 from CD-Rom or Hard Drive
141
Section 12 Alarm Monitor
143
Alarm Monitor Overview
143
Installing the Alarm Monitor
143
Configuring the Dvr
144
Configuring the Client Pc
145
Alarm Monitor Window
146
Event List Right Click
147
Search Alarm Window
148
Configuration Window
149
Section 13 Remote Software
151
Fusion Remote Software Overview
151
Remote Client Minimum Requirements
152
Remote Client Recommended Requirements
152
Setting up the Server to Accept Incoming Connections
153
Configuring the Dvr Server to Accept Remote Connections
153
Setting up the Fusion Remote Software
154
Installing the Fusion Remote Software
154
Creating a New Remote Connection
155
Section 14 the Web Viewer
157
Web Viewer Overview
157
Configuring the Dvr Server to Accept Remote Connections
158
Connecting to a Dvr with the Web Viewer
159
Closing the Web Viewer
159
Section 15 Technical Specifications
161
Fusion III 8-Channel
161
Fusion III 16-Channel
162
Fusion III 32-Channel
163
Advertisement
Advertisement
Related Products
Honeywell FUSION
Honeywell Fusion IV
Honeywell FUSION STREAMER
Honeywell Fusion4 MSC-L
Honeywell F114C
Honeywell MeshGuard FTD-2000
Honeywell FF-SPS44CRE
Honeywell FF-SPS44TRE
Honeywell F111A1020B-3S
Honeywell Fire-Lite FL-PS6
Honeywell Categories
Thermostat
Controller
Control Unit
Security Camera
Accessories
More Honeywell Manuals
Login
Sign In
OR
Sign in with Facebook
Sign in with Google
Upload manual
Upload from disk
Upload from URL