Sign In
Upload
Manuals
Brands
GE Manuals
Medical Equipment
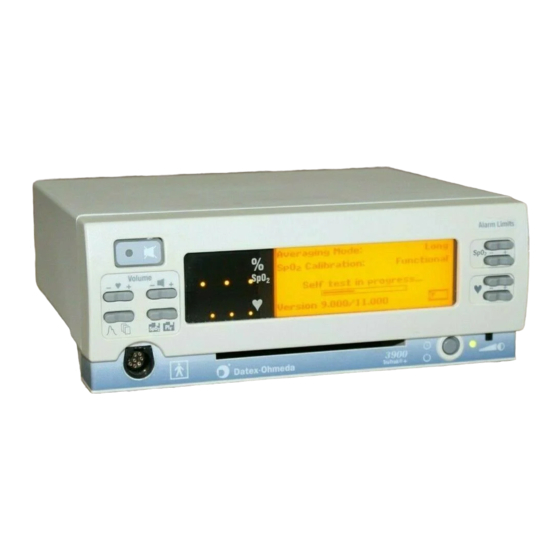
TruTrak+ 3900
GE TruTrak+ 3900 Manuals
Manuals and User Guides for GE TruTrak+ 3900. We have
1
GE TruTrak+ 3900 manual available for free PDF download: User Manual
GE TruTrak+ 3900 User Manual (107 pages)
Brand:
GE
| Category:
Medical Equipment
| Size: 1.05 MB
Table of Contents
Table of Contents
5
1 /Overview
11
Product Description
11
Intended Use
11
Trutrak+ Technology
11
PI R Pulsatile Value
12
Other Features
12
Functional Components
13
Figure 1-1. Signal Processing Block Diagram
13
Principles of Operation
14
Figure 1-2. Comparative Light Absorption
14
Figure 1-3. Extinction Versus Wavelength Graph
14
Calibration
15
Front Panel
16
Alarm Silence Button
16
Figure 1-4. 3900P Pulse Oximeter Front Panel
16
Alarm Silence
17
All Mute
17
Numeric Display
17
Graphic Display
18
Spo 2 Alarm Limits, High and Low
19
Pulse Rate Alarm Limits, High and Low
19
Display Contrast Adjuster
19
Power/Standby Button/Ac Power Light
19
Battery Operation
19
Carrying Handle
20
Sensor Connector
20
10 Screen Option Buttons
20
Pulse Beep Volume Button
21
Alarm Volume Button
21
13 Printer
21
Rear Panel
22
Power Entry Module
22
Equipotential Ground Connector
22
Product Information Label
22
Mode Switch
22
5 RS-232 Serial/Analog Connector
22
Figure 1-5. 3900/3900P Pulse Oximeter Rear Panel
22
Precautions
23
Warnings
23
Data Validity
23
Electrical Shock Hazard
23
Explosion Hazard
23
Failure of Operation
23
Electrical Shock and Flammability Hazard
24
Patient Safety
24
Patient Safety (Modem)
24
Patient Safety (Sensors)
24
RS-232 System Interconnection
24
Cautions
25
Battery
25
Cleaning
25
Disposal
25
Handle the Monitor with Care
25
Printer
25
Sensors
25
2 /Setup and Operations
27
Powering the Oximeter
27
Setup
28
Factory Settings
28
After Powering on the Oximeter
28
Before Powering on the Oximeter
28
Mode Switch Settings
29
Language Selection
29
Averaging Mode
30
EMI Line Frequency
30
PI R Pulsatile Value Display
30
Checkout Procedure
31
Signal and Data Validity
34
Plethysmographic Waveform
34
Figure 2-1. Typical Adult Plethysmographic Waveform
34
Figure 2-2. Typical Neonate Plethysmographic Waveform
34
Low Perfusion
34
Figure 2-3. Low Perfusion Waveform
35
Figure 2-4. Noisy Plethysmographic Waveform
35
Signal Noise
35
Numeric Display
36
PI R Pulsatile Value
36
Pulse Rate
36
Spo 2
36
Waveform Screen Button
37
Menu Button
37
Main Menu Function Key Buttons
37
Figure 2-5. Main Menu
37
Labels
38
Summary: Custom Patient Labels
38
Figure 2-6. LABELS Screen
39
Function Key
39
Select Character Function Keys
39
Select Field Function Keys
39
Clear
40
Locking Label Lines
40
Settings
41
Save Limits
41
All Mute
41
Baud Rate
41
Analog
41
Mode
41
Output
41
CONTRAST (3900P Printer Only)
41
Figure 2-7. Settings Screen Options
41
Date and Time
43
Date
43
Time
43
Figure 2-8. DATE/TIME Screen
43
Trend Options
44
Trend Function Keys
45
Clear
45
Scroll Buttons
45
Shift Buttons
45
Viewing Time Scale for Display
46
Trend Data
46
Patient Function Key Lockout
48
3 /Messages and Troubleshooting
49
Messages
49
Alarm Categories
53
High Priority
53
Medium Priority
53
Low Priority
54
System Failure
54
Troubleshooting
55
4 /Printer
58
Printer Buttons
58
Print Real-Time Data
58
Summary Statistics Only
58
Trend Print
58
Figure 4-1. 3900P Printer
58
Figure 4-2. SELECT HOURS Screen
58
Stop Print/Advance Paper
59
Printed Data Samples
59
Figure 4-3. Printed Data Samples
60
Printer Maintenance
61
Replacing the Paper Roll
61
Figure 4-4. Replacing the Paper Roll
61
Removing a Paper Jam
62
Figure 4-5. Removing the Paper-Feed Cover
62
5 /Teleoximetry
63
Using a Modem: Summary
63
Modem Connection
64
Modem Status
65
Figure 5-1. MODEM STATUS Screen
65
Select Data
66
Figure 5-2. SELECT HOURS Screen
66
Send
67
Figure 5-3. SEND Screen
67
Fax
68
Figure 5-4. PHONE NUMBER Screen
68
Canceling a Transmission (FAX CANCELED)
69
Fax Transmission Messages
69
Figure 5-5. SENDING FAX Screen
69
Sending Data to a Remote Computer
70
Remote Computer Requirements
70
Preparing for Transmission
70
Dialing and Answering Calls at the Remote Computer
70
Receiving the Data File at the Remote Computer
70
Remote Computer
71
Wait for Call
71
Figure 5-6. SENDING DATA Screen
71
Canceling a Transmission (TRANSMISSION CANCELED)
72
Transmission Failure Messages
72
Modem Setup
73
Guard Tone
73
Custom Initialization String
73
Figure 5-7. MODEM SETUP Screen
73
Default Initialization String
74
Figure 5-8. INITIALIZATION STRING Screen
74
Sample Reports
75
Remote Computer Report Format
75
Instareport Fax-Spo 2 Mode
76
Instareport Fax-PI R Mode
78
6 /Maintenance and Service
81
Cleaning
81
Oximeter (with or Without the Printer)
81
Recharging the Battery
82
Replacing the Battery
82
Replacing the Fuses
83
Repair Policy and Procedure
84
Packaging and Return Procedure
84
Parts List
85
7 /Compliance and Specifications
87
Compliance with Standards
87
General Safety Requirements
87
Electromagnetic Compatibility (EMC)
88
Electromagnetic Effects
88
Safety Checks for Software
88
Specifications
89
Circuitry
89
Audio Indicators
89
Audible Alarms
89
Alarm Limits
89
Displays
90
Mode Switch
90
Spo
90
Interfering Substances
90
Pulse Rate
91
PI R Pulsatile Value
91
Sensor Emitter Wavelength Ranges
91
Environmental
91
Electrical
91
Battery
91
Current Leakage
92
Fuses
92
Power
92
RS-232 Serial/Analog Connector
92
Analog Output
92
Serial Output
92
Dimensions and Weight
92
A/Screen Maps
93
Screen Maps
95
Serial Device Communications
97
Requirements
97
RS-232 Interface Cable-Serial Pinout
98
Connection
98
Serial Communication Output
99
Auto-Output Mode
100
Trend-Output Mode
100
Analog Device Communications
100
RS-232 Serial/Analog Interface Cable-Analog Pinout
101
Advertisement
Advertisement
Related Products
GE TruSat
GE TuffSat
GE ApexPro T9
GE Vivid T8 Pro
GE Transport Pro
GE TONOPORT VI
GE Typhoon Trio
GE TruVision TVC-BIR-MR
GE TruVision TVC-BIR-HR
GE Triton XL GSD6500
GE Categories
Refrigerator
Ranges
Microwave Oven
Air Conditioner
Dishwasher
More GE Manuals
Login
Sign In
OR
Sign in with Facebook
Sign in with Google
Upload manual
Upload from disk
Upload from URL