Sign In
Upload
Manuals
Brands
GE Manuals
Medical Equipment
H48681BC
GE H48681BC Manuals
Manuals and User Guides for GE H48681BC. We have
1
GE H48681BC manual available for free PDF download: Service Manual
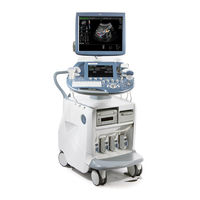
GE H48681BC Service Manual (432 pages)
Brand:
GE
| Category:
Medical Equipment
| Size: 22.55 MB
Table of Contents
Table of Contents
15
CHAPTER 1 Introduction
39
Overview
39
Purpose of this Chapter
39
Contents in this Chapter
39
Purpose of Service Manual
39
Typical Users of the Basic Service Manual
40
Models Covered by this Manual
40
System History - Hardware and Software Versions
43
How to Identify the Systems
44
Purpose of Operator Manual(S)
44
Important Conventions
45
Conventions Used in this Manual
45
Standard Hazard Icons
46
Product Labels and Icons
46
Safety Considerations
49
Introduction
49
Human Safety
49
Mechanical Safety
49
Electrical Safety
50
Safe Practices
50
Probes
50
Auxiliary Devices Safety
50
Labels Locations
52
Identification and Rating Plate
52
Dangerous Procedure Warnings
53
Lockout/Tagout Requirements (for USA Only)
53
Returning/Shipping System, Probes and Repair Parts
53
Electromagnetic Compatibility (EMC)
54
What Is EMC
54
Compliance
54
Electrostatic Discharge (ESD) Prevention
54
Customer Assistance
55
Contact Information
55
CHAPTER 2 Site Preparation
57
Overview
57
Purpose of this Chapter
57
Contents in this Chapter
57
General Console Requirements
58
Environmental Requirements
58
Cooling
58
Lighting
58
Electrical Requirements
58
Voluson E8 / Voluson E6 Power Requirements
59
Inrush Current
59
Site Circuit Breaker
59
Site Power Outlets
59
Main Power Plug
59
EMI Limitations
60
Probe Environmental Requirements
61
Time and Manpower Requirements
61
System Specifications
61
Physical Dimensions of Voluson E8 / Voluson E6
61
Acoustic Noise Output
61
Electrical Specifications
61
Facility Needs
62
Purchaser Responsibilities
62
Mandatory Site Requirements
63
Site Recommendations
63
Recommended Ultrasound Room Layout
64
Networking Setup Requirements
65
Stand-Alone System (Without Network Connection)
65
Unit Connected to Hospital's Network
65
Purpose of the DICOM Network Function
65
DICOM Option Pre-Installation Requirements
65
CHAPTER 3 Setup Instructions
67
Overview
67
Purpose of this Chapter
67
Contents in this Chapter
67
Set up Reminders
67
Average Installation Time
67
Installation Warnings
68
Moving/Lifting the System
68
System Acclimation Time
68
Control Panel Position
68
Brake Pedal Operation
69
Safety Reminders
69
Receiving and Unpacking the Equipment
70
Preparing for Set up
73
Verify Customer Order
73
System Voltage Settings
74
EMI Protection
74
Connection of Auxiliary Devices
75
Connecting the LCD Monitor
76
Connecting the Black & White Printer
77
Connection Scheme: B&W Printer
78
Connecting the Color Printer
79
Connection Scheme: Color Printer
80
Connecting the Deskjet Color Printer
81
Connection Via Bluetooth Adapter
81
Connecting the DVD Recorder
82
Connection Scheme: DVD Recorder
83
Adjustment of the DVD Recorder Settings
84
Changing the Remote Interface to USB
84
Changing TV System (Video Format)
85
Change the Region Code
87
Connecting the Wireless Network Adapter
88
Connecting the VGA Image (Video) Resizer
89
Adjustment of the VGA Image Resizer Settings
90
Connecting the 19" LCD Secondary "Patient" Monitor
91
Connecting the Footswitch
93
Connecting the ECG-Preamplifier
94
Connecting the USB Flash Memory Stick
95
Connecting the External USB Hard Disk (Handydrive)
95
General Remarks and Hints When Using External USB-Devices
96
External USB-Devices - Connection
96
External USB-Devices - Disconnection
96
Completing the Set up
97
Connecting the System to a Power Source
97
Power on / Boot up
97
Scanner Power on
97
Back End Processor Boot up
98
During a Normal Boot, You May Observe
99
Power off / Shutdown
100
Scanner Shutdown
100
Transducer Connection
101
Printer Installation
102
Installing Digital Black & White Printer
102
Installing Digital Color Printer
102
Printer Installation Manually
103
Adjustment of Printer Settings
107
UP-D897 Printer - Settings
108
P95D Printer - Settings
109
CP30D Printer - Settings
110
UP-D25MD Printer - Settings
111
UP-D23MD Printer - Settings
113
Remote Control Selection
114
Report Printer Selection
114
System Configuration
115
System Setup
115
To Invoke the Setup Procedure
115
How to Enter Date and Time
116
How to Enter Hospital Name
116
How to Change Language And/Or EUM Language
116
How to Activate Screen Lock
117
How to Change Video Norm
118
How to Change Recorder Type
118
How to Adjust Function of the Footswitch
118
How to Change the Keyboard Layout
118
How to Configure Service Platform
118
Measure Setup
119
To Invoke the Setup Procedure
119
On-Board Optional Peripherals
120
External I/O Connectors
121
External I/O Pin Outs
122
Video Specification
124
Available Probes
124
Software/Option Configuration
124
Connectivity Setup
125
Connectivity Introduction
125
The Dataflow Concept
125
Dataflow Examples
126
Stand-Alone Voluson E8 / Voluson E6
127
Voluson + PC (with 4D View Software) Within a "Sneaker Net
127
Connection between Voluson and DICOM Server
127
Wireless Network Configuration
128
Description of "Netgear" Configuration Parameters
130
Network IP Address Configuration
131
Map Network Drive
132
Connectivity Setup Worksheet
134
Paperwork
136
Product Locator Installation
136
User Manual(S)
136
Raft Section 5-3 Frontend Processor
208
RTF- Probe Connector Board
209
RTM - Beamformer Motherboard
211
RSR- Beamformer Receiver Subboards
212
RST- Beamformer Transmitter Subboards
212
RSW - CW-Doppler Board (Optional)
213
RTK - Motherboard
213
RFI - Radio Frequency Interface "Controller" Board
214
Diagnostics/Troubleshooting
273
Collect Vital System Information
275
Hardware Configuration Detection
276
Request for Service (RFS)
277
Shortcuts List
279
Check Points Voltages
280
Screen Captures and Logs
281
Capturing a Screen
281
Export Log's and System Data
282
Remote Access to Service Platform
284
General
284
How the Customer Enables/Disables Disruptive Mode and VCO
284
Common Service Desktop (CSD)
286
CSD: Configuration
287
How to Use the Auto Tester Program
289
Minimum Configuration to Boot/Scan
291
Section 7-8 Troubleshooting Trees, Instructions and Tech Tips
293
Troubleshooting Trees, Instructions and Tech Tips
294
System Does Not Boot up
294
Noise Disturbs the Image
295
Trackball - Impaired Sensitivity
296
Printer Malfunction
297
Monitor Troubleshooting
298
DVD/CD-Drive Resp. DVR-Drive Tests
299
Export Images from "Local Archive" to DVD/CD+R/RW
299
Network Troubleshooting
302
Tech Tips
303
-1-3 Returning/Shipping System, Probes and Repair Parts
320
System Software - Installation/Upgrade Procedure
321
Software and Functional Checks after Installation/Upgrade Procedure
329
Full Backup (Full System Configuration) - Loading Procedure
330
Image Archive - Loading Procedure
330
Image Settings Only - Loading Procedure
330
Replacement or Activation of Options
331
Replacement of Covers
334
Replacement of Footrest Cover
334
Replacement of Voluson Cover
335
Replacement of the Cable Holder
336
Replacement of the Probe Holder (Kit)
337
Replacement of the Probe Holder for Endocavity Probes
338
Replacement of the Trackball Ring
338
Replacement of Key Caps (by Special Native Language Keys)
339
Replacement of the Caps for TGC Sliders And/Or Rotation Digipots
340
Replacement of the Caps for Hardkeys
341
Replacement of Circle Key Caps Only
341
Replacement of the Monitor Transportation Lock (BT09 Only)
342
Replacing Optional Peripherals / How to Mount Peripherals at a Later Date
343
Mounting/Replacing the VGA Image (Video) Resizer
344
Mounting/Replacing the 19" LCD Secondary "Patient" Monitor
347
Draft Chapter 9 Renewal Parts
353
List of Abbreviations
354
Parts List Groups
355
Housing - Mechanical Hardware Parts & Covers
356
User Interface
360
Monitor + Monitor Replacement Parts
363
Main Power Modules
364
Main Board Module
365
Frontend (US-Part) Components
365
Backend (PC-Part) Components
368
Options and Upgrades
370
Miscellaneous Cables
373
Optional Peripherals and Accessories
382
Recording Tools
382
Printers
383
Drives & Additional Devices
384
Optional Equipment
385
System Manuals
387
Probes
391
Probes - Curved Array Transducers
392
Probes - Linear Array Transducers
393
Probes - Phased Array Transducers
394
Real-Time 4D Volume Probes
395
CW-Doppler - Pencil Probes
397
Biopsy Needle Guides
398
Why Do Maintenance
402
Maintenance Task Schedule
402
Tools Required
405
System Maintenance
406
Using a Phantom
412
Electrical Safety Tests
412
When There's too Much Leakage Current
424
Ultrasound Equipment Quality Check (EQC)
425
Electrical Safety Test Form
426
Advertisement
Advertisement
Related Products
GE H48681BX
GE H48681BY
GE H48681BM
GE H48681BN
GE H48681BP
GE H48681BT
GE H48681BF
GE H48681BK
GE H48681BH
GE H48681BG
GE Categories
Refrigerator
Ranges
Microwave Oven
Air Conditioner
Dishwasher
More GE Manuals
Login
Sign In
OR
Sign in with Facebook
Sign in with Google
Upload manual
Upload from disk
Upload from URL