Advertisement
Quick Links
OdorStop, LLC
5139 Southwestern Blvd,
Hamburg, NY 14075 USA
Phone: 1 (888) 956-7468
Fax: 1 (716) 648-6406
www.OdorStop.com
OS36 & OS72
UV Air Treatment System
Purchase Date: ____________________________________________
Serial Number: _____________________________________________
Purchased From: __________________________________________
© Copyright 2016. OdorStop, LLC
OS36OS72-061616
Advertisement

Summary of Contents for OdorStop OS36
- Page 1 OS36 & OS72 UV Air Treatment System Purchase Date: ____________________________________________ OdorStop, LLC 5139 Southwestern Blvd, Serial Number: _____________________________________________ Hamburg, NY 14075 USA Phone: 1 (888) 956-7468 Purchased From: __________________________________________ Fax: 1 (716) 648-6406 www.OdorStop.com © Copyright 2016. OdorStop, LLC OS36OS72-061616...
- Page 2 Thank you for purchasing this OdorStop product. Please read the instructions carefully and follow all warnings. All OdorStop products are manufactured to be simple to use and provide years of worry free service when the recommendations in this manual are followed. Please call OdorStop at 1(888) 956-7468 with any questions or concerns.
-
Page 3: Installation
System (unit) be mounted directly above the cooling coil. The • Spare Fuse OS36/OS72 can prevent the growth of a high percentage • Instruction Manual of micro-organisms such as mold, bacteria and viruses on surfaces such as cooling coils, drain pans and duct work. - Page 4 2. Cut out the template from the back page and tape it to the duct work in intended installation position. 3. For OS36: drill pilot holes 1-5 with a 3/32” drill bit where indicated. For OS72: drill pilot holes 1-6 with a 3/32” drill bit where indicated.
- Page 5 5. Install the bulb in the unit by sliding the bulb in from the outside until the bulb snaps into place. Insert the unit into the metal duct work. If you touch the bulb with your hands, use a cloth to wipe any fingerprints from the bulb(s). 6. Attach the unit to duct work with the supplied 4 sheet metal screws using a ¼” nut driver. Make sure to tighten screws evenly. The unit has a factory installed gasket that ensures a tight seal between the unit and the duct work. Be sure the unit is flat against the duct work on all sides.
- Page 6 2. Remove 4 sheet metal screws and slide the unit out of the duct work. 3a. To Clean: Hold the unit securely and wipe the UV bulb(s) with a soft cloth dampened with glass cleaner. If you touch the glass with your hand, be sure to wipe away any fingerprints or dirt with cloth. Make sure the bulb is clean and dry before installing unit back into duct. 3b. To Replace: Visit www.OdorStop.com to purchase new UV bulbs if needed. Use of any bulb not approved for the unit will void the warranty and could cause serious injury or damage. Hold the unit securely and push the bulb release button to remove the UV bulb. Install the new bulb into the unit by sliding the bulb in from the outside until the bulb snaps into place. If you touch the bulb with your hand, be sure to wipe away any fingerprints or dirt with a soft damp cloth. Make sure the bulb(s) is/...
-
Page 7: Troubleshooting
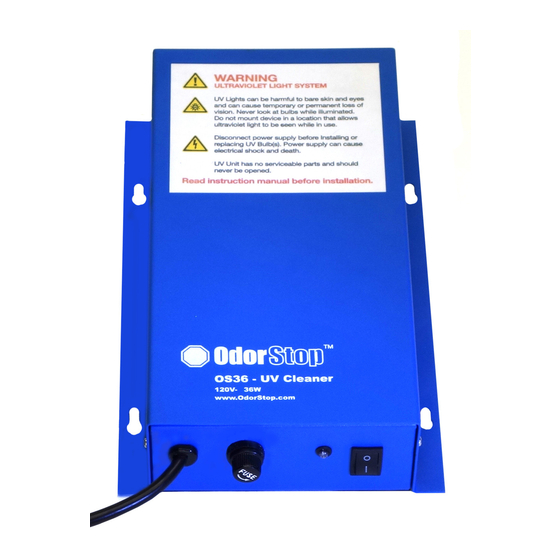
Troubleshooting The OdorStop UV Air Treatment System is equipped with LED indicator light(s) that verify the unit is working properly. The OS36 has 1 LED and the OS72 has 2 LEDs. For OS72: the LED light closest to the on/off switch indicates the status of the UV bulb farthest from the on/off switch. Note: The LED light(s) will not shut off when the bulb(s) need replacement. They will only shut off if the bulb breaks or burns out. The OS72 will operate with one properly functioning bulb. For maximum effectiveness, both bulbs should be operating properly. LED lights indicate the following: • If the LED light(s) is/are green, the UNIT and BULB(s) are functioning properly. • If one or both LED lights are blinking, the UNIT is faulty and must be replaced. • If one or both LED lights are not illuminated, the following are possible causes: • There is no power to the unit - turn on the power supply or plug in the unit. • The on/off switch is in the “off” position - place switch in “on” position. • The bulb(s) is/are faulty - replace bulb(s). • The fuse on the unit is faulty - replace the fuse. • The LED light has failed - the unit must be replaced. -
Page 8: Limited Warranty
(the “unit”) against any defect in materials and workmanship as follows: For two (2) years from the date of retail purchase, OdorStop, LLC, at its option, will replace or repair the unit without charge to the customer. Any repair or replacement of the unit will be warranted only for the balance of the original warranty period or ninety (90) days, whichever is greater. The following will void and/or are not covered under this limited warranty: a) Damage caused... - Page 9 FOR OS36 AND OS72 OdorStop UV Air Treatment System OS36 / OS72 INSTALLATION TEMPLATE STEP 1 - DRILL PILOT HOLES WITH 3/32” DRILL BIT STEP 2 - CUT HOLES WITH 2 1/2” HOLE SAW CAUTION: BE SURE TO WEAR APPROPRIATE PROTECTION AS CUTTING METAL IS LOUD AND PIECES MAY BE SHARP AND HOT.