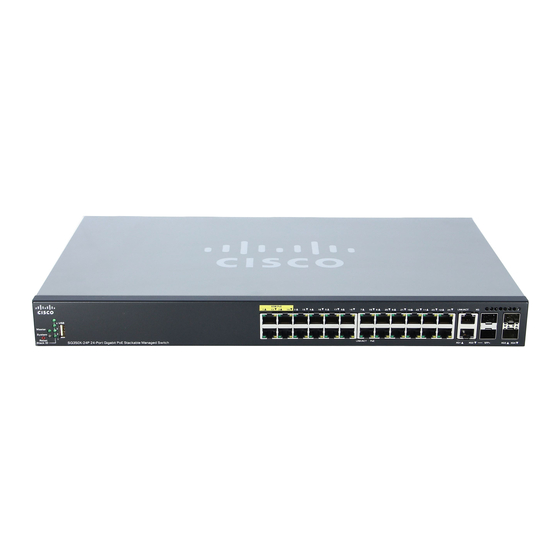
Cisco SG350X-24P Quick Start Manual
350x series managed switches
Hide thumbs
Also See for SG350X-24P:
- Administration manual (762 pages) ,
- Administration manual (725 pages)
Advertisement
Advertisement
Table of Contents

Summary of Contents for Cisco SG350X-24P
-
Page 1: Quick Start Guide
Quick Start Guide Cisco 350X Series Managed Switches... - Page 2 Welcome Thank you for choosing the Cisco 350X Series Managed Switches. The switches are designed to be operational right out-of-the-box as standard layer 2 and 3 switches. Using the default configuration, your switch forwards packets between the connecting devices after power up.
-
Page 3: Rack Mounting
Mounting the Cisco 350X Series Switches Your switch can be installed in the following ways: • Place the switch on a flat surface. To place the switch on a desktop, install the four rubber feet (included) on the bottom of the switch. -
Page 4: Connecting Network Devices
Ethernet ports of the switch. The Ethernet port light turns green when the connection is active. Refer to Cisco 350X Series Switch Features for details about the different ports and LEDs on each switch. Cisco 350X Series Managed Switches... - Page 5 *60-Watt UPoE: ports 5, 6, 7, 8 375 Watts 1–24 SG350X-24PD *60-Watt UPoE: ports 11, 12, 23, 24 *60-Watt PoE extends the IEEE Power of Ethernet Plus standard to double the power per port to 60 Watts. Cisco 350X Series Managed Switches...
- Page 6 Using the console port requires advanced user skills. These are the default settings used when configuring your switch for the first time. Parameter Default Value Username cisco Password cisco LAN IP 192.168.1.254 Cisco 350X Series Managed Switches...
- Page 7 To configure the switch using the web-based interface: Power on the computer and your switch. For Cisco 350XG switches, connect the computer to the OOB port found on the front panel. For Cisco 350X switches, connect the computer to any network port.
- Page 8 When the login page appears, choose the language that you prefer to use in the web-based interface and enter the username and password. The default username is cisco. The default password is cisco. Usernames and passwords are both case sensitive. Click Log In.
- Page 9 1 stop bit • no flow control Enter a username and password. The default username is cisco, and the default password is cisco. Usernames and passwords are both case sensitive. If this is the first time that you have logged on with the default...
- Page 10 A stack can have up to four Cisco 350XG series switches in it. Any 10G port of the switch can be used for stacking. The switch can only be stacked without Mesh topology.
-
Page 11: Product Models
Cisco 350X Series Switch Features This section describes the exterior of the switch to help familiarize you with your switch. Product Models Model Description SG350X-24 24-Port Gigabit Stackable Managed Switch SG350X-24P 24-Port Gigabit PoE Stackable Managed Switch SG350X-24MP 24-Port Gigabit PoE Stackable Managed Switch... - Page 12 • The SFP+ ports are compatible with Cisco modules MGBSX1, MGBLH1, MGBT1, MGBLX1, MGBBX1, as well as other brands of modules. • The Cisco SFP+ 10G optical modules that are supported in the Cisco switches are: SFP-10G-SR, and SFP-10G-LR. • The Cisco SFP+ Copper Cable modules for stacking that are supported in the Cisco switches are: SFP-H10GB-CU1M, SFP-H10GB-CU3M, and SFP-H10GB-CU5M.
- Page 13 These ports are also commonly referred to as miniGigaBit Interface Converter (miniGBIC) ports. The term SFP is used in this guide. • SFP ports are compatible with Cisco modules MGBT1, MGBSX1, MGBLH1, MGBLX1, MGBBX1, MFELX1, MFEFX1, and MFEBX1, as well as other brands of modules.
-
Page 14: Back Panel
• To restore the switch to its factory default settings: – Disconnect the switch from the network or disable all DHCP servers on your network. – With the power on, press and hold the Reset button for more than ten seconds. Cisco 350X Series Managed Switches... - Page 15 • Use a different Ethernet cable or port. Bad Console port connection • Verify the console cable connectors are firmly plugged into the switch and your computer. • Verify the console port utility is configured with the correct parameters. Cisco 350X Series Managed Switches...
- Page 16 IP Addressing Issues • The Cisco switches can also be accessed by the Cisco FindIT Network Discovery Utility that automatically discovers all Cisco Small Business devices in the same local network segment as your computer. You can view device information including the current IP address, download the latest firmware for the device, or launch the product configuration utility to view and configure the settings.
-
Page 17: Where To Go From Here
(such as the GNU Lesser/General Public License), please send your request to: externalopensource-requests@cisco.com In your requests please include the Cisco product name, version, and the 18 digit reference number (for example: 7XEEX17D99-3X49X081) found in the product open source documentation. - Page 18 Cisco and the Cisco logo are trademarks or registered trademarks of Cisco and/or its affiliates in the U.S. and other countries. To view a list of Cisco trademarks, go to this URL: www.cisco.com/go/trademarks. Third-party trademarks mentioned are the property of their respective owners.


